-
Notifications
You must be signed in to change notification settings - Fork 15
6. Updating MagSpoof V4 and V5
The Arduino Integrated Development Environment - or Arduino Software (IDE) - contains a text editor for writing code, a message area, a text console, a toolbar with buttons for common functions, and a series of menus. The Arduino Software allows you to write programs and upload them to your board.
First, you will need to download and install the Arduino IDE, which you can find here available on different OS. If needed, specific instructions are mentioned here.
If the installation was successful you should see the next window.

After installing Arduino IDE, in order to start programming with it, you'll need to install our boards core, don't worry it is nothing to write home about, here is a quick guide on how to install them.
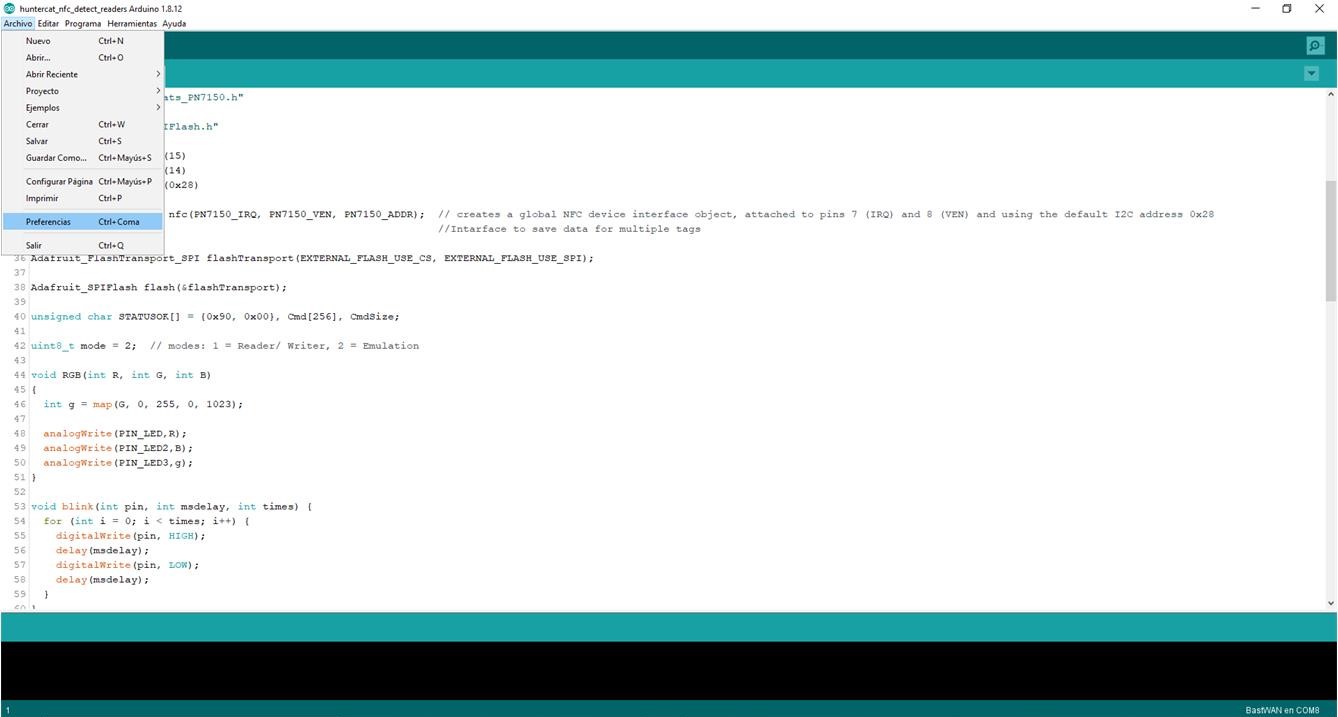
To add board support for WCH products, open the Preferences window (File > Preferences).

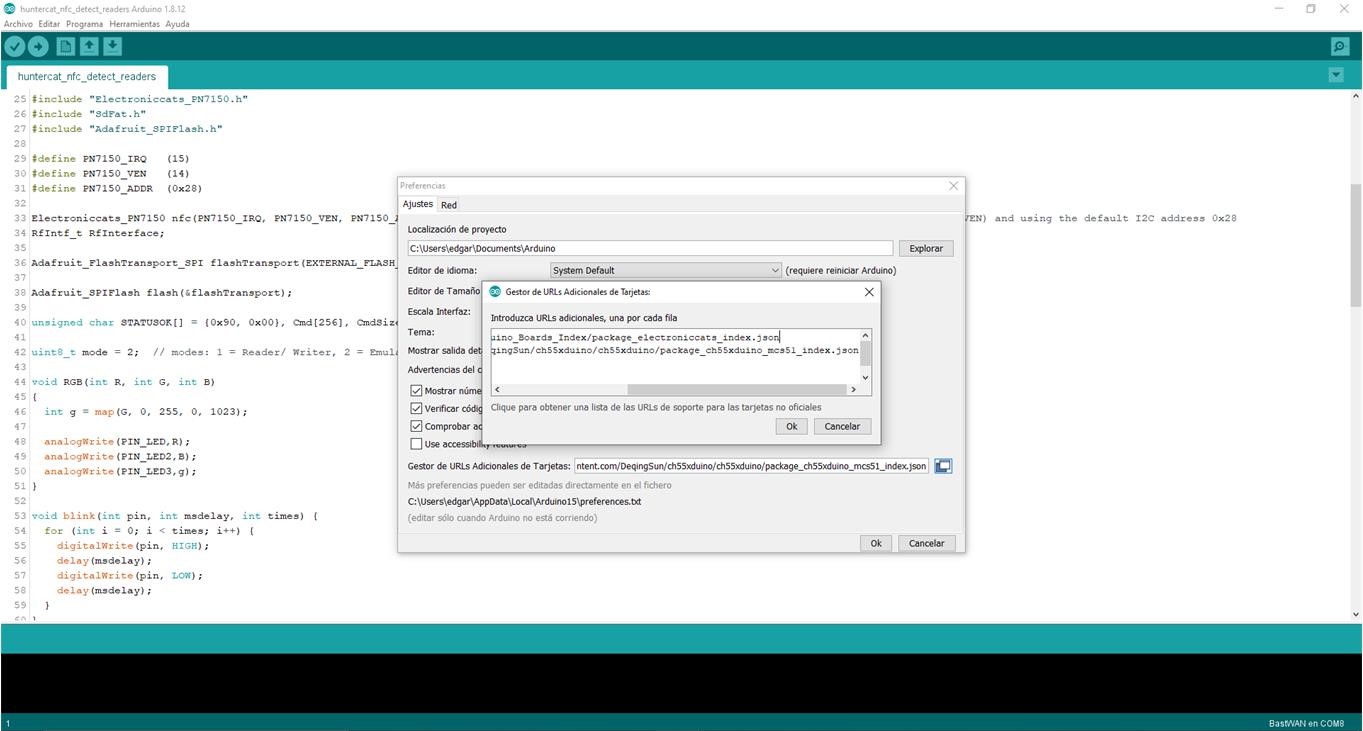
Now, copy and paste the following URL into the 'Additional Boards Manager URLs' input field:
https://raw.githubusercontent.com/DeqingSun/ch55xduino/ch55xduino/package_ch55xduino_mcs51_index.json

- If there is already an URL from another manufacturer in that field, click the button at the right end of the field. This will open an editing window allowing you to paste the above URL onto a new line.
- Press the "OK" button.
- Open the "Boards Manager" that is in Tools > Board > Board Manager.
- Then, write
ch55xin the search bar. - Click install, just wait to finish installing, and close the window.
In Tools > Boards, scroll down the boards list until you see the ch55xduino boards.

Warning
MagSpoof V4 works at 3.3V and a Clock Source speed of 16MHz, if you select any other configuration at the time uploading code to the board it may brick.
Connect your MagSpoof V4 to your PC. You should see your board in PORTS (COM) section:
MagSpoof V4 and V5 has a Bootloader Mode that is activated by making a short circuit between the pads of JP1:


It is needed to install a driver that will allow the PC to detect the board when the bootloader mode is launched.

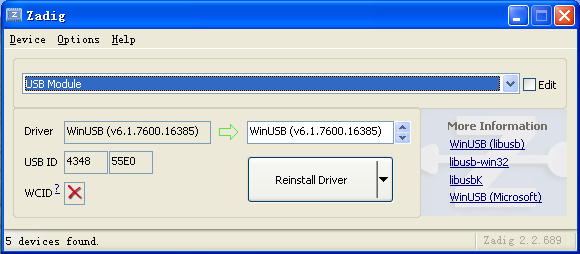
Zadig is the recommended tool to install drivers in Windows. The bootloader (4348,55E0) should be installed with WinUSB or libusb-win32 driver.
You can use USB Serial (CDC) driver for default CDC USB stack. If you tried to emulate another type of USB device without changing the PID/VID, you may need to uninstall the device before installing a new driver.
Execute Zagdig, you will see the next window:
To install the driver for the bootloader mode, disconnect your board from your PC and put a jumper wire making a short circuit between the pads of JP1 (back of the board). Connect again MagSpoof V4 to your PC. The green LED must turn on and remain on while the short circuit is on the JP1 pads. Now, you should see an "Unknown Device" in PORTS (COM) section.
Select "Unknown Device #1" in Zadig and select the WinUSB or libusb-win32 driver. By checking the "Edit" box, you can also change the name of the device. Then, click on "Replace Driver" (this is in case there was another driver already installed):

In case no driver was previously installed, click on "Install Driver".
Once the board is in bootloader mode (and the WinUSB or libusb-win32 has been installed for the device), you should see MagSpoof V4 in the Device Manager as follows:

