-
Notifications
You must be signed in to change notification settings - Fork 2
Direct Control
This example demonstrate basics of module control using direct control message sent from computer (0x10A frame type).
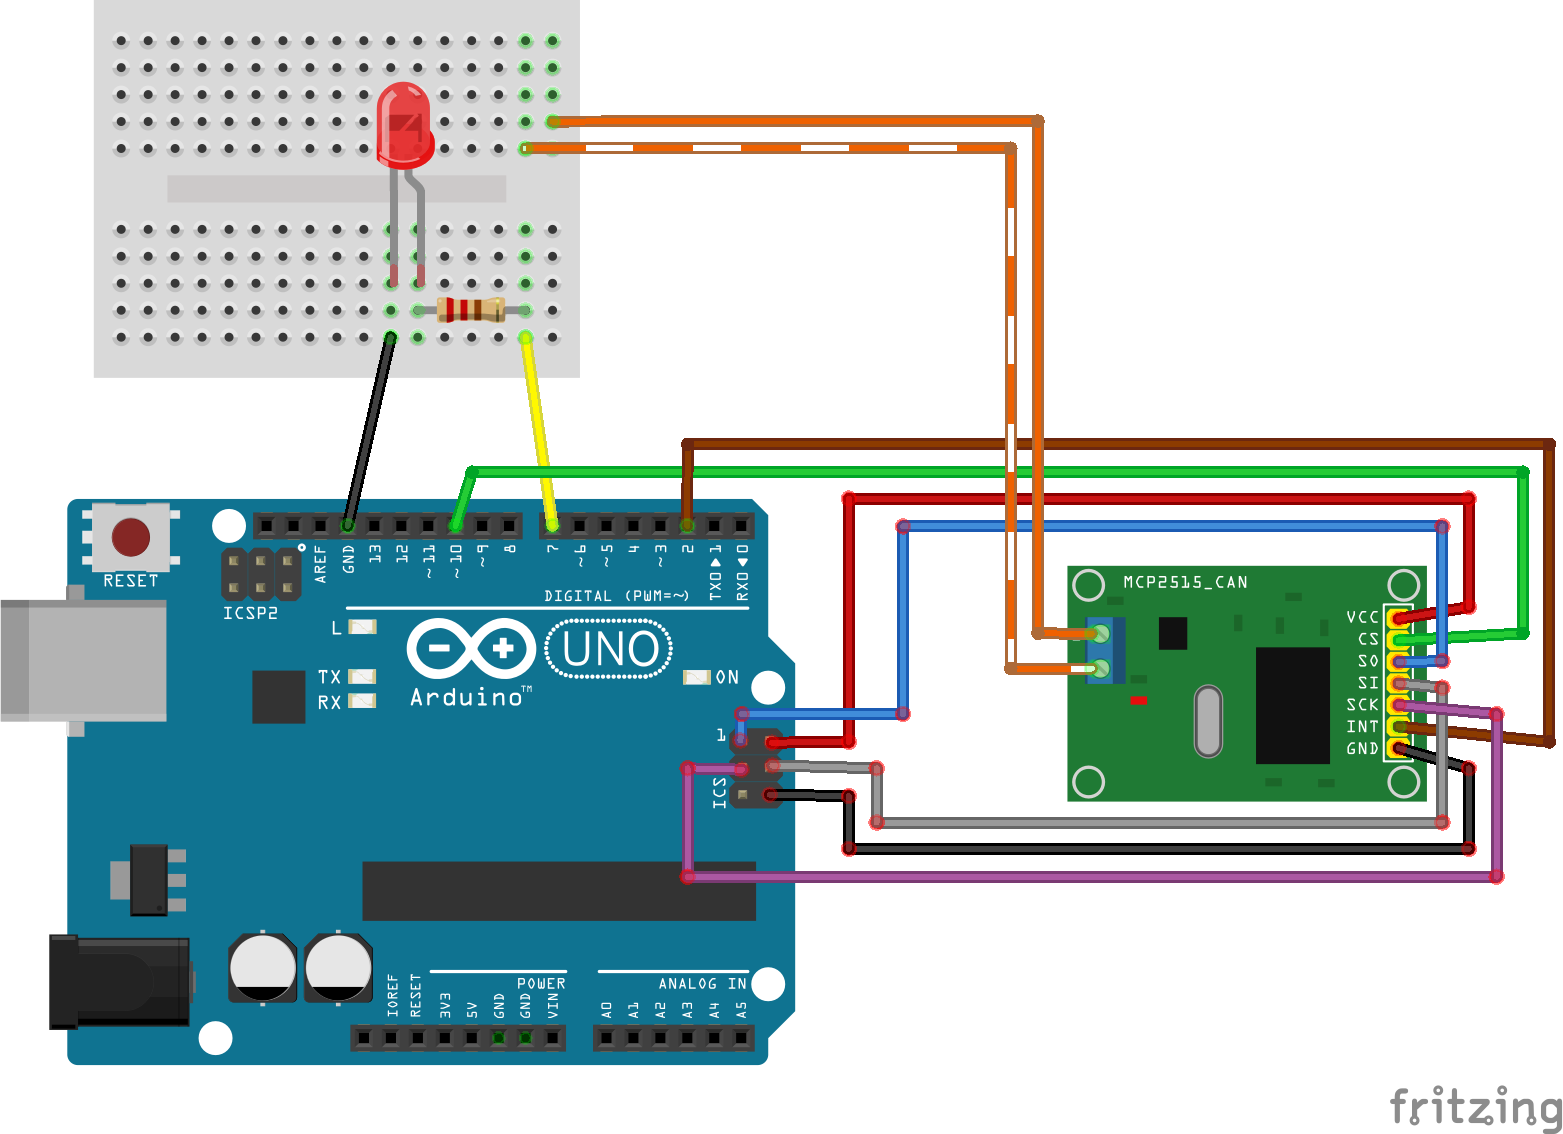
Direct control example device will allows You to control LED connected to Arduino PIN7 using Hapcan's direct control message. This message can be send with Hapcan Programmer.
Follow the HelloWorld example setup and requirements. Connect LED to PIN7 with 1kOhm resistor like below.

So we want to control our new device. Let's start with the basic approach,which will teach You how to interact with Hapcanuino device.
When You send direct control frame (0x10A) to the Hapcan bus, the Hapcanuino will check if that frame is dedicated to our device by comparing group and node info. If the frame pass this test Hapcanuino will raise an event, that You should handle.
In basic apporach You just define special callback function and register it in HapcanDevice class object.
Before setup() function in Your ino file put the function declaration:
void ExecuteInstruction(Hapcan::InstructionStruct& exec, Hapcan::HapcanMessage& message);The function name is irrelevant. You can name it whatever You want, but function signature must be as above.
In setup() function register this callback function.
//set callback function
hapcanDevice.SetExecuteInstructionDelegate(ExecuteInstruction);
Now, each time the device receive direct control frame the Hapcanuino will call this function, passing instruction parameters and whole received message.
In fact, this function is also called by indirect instructions defined with boxes - this topic will be covered later.
In this example we want to control the LED, so in setup() function init the diode pin as output.
// demo example, set PIN7 as an output
pinMode(PIN7, OUTPUT);
Finally, our callback function body:
void ExecuteInstruction(Hapcan::InstructionStruct& exec, Hapcan::HapcanMessage& message)
{
	switch (exec.Instruction())
	{
	case 1: // turn LED ON
		digitalWrite(PIN7, HIGH);
		break;
	case 2: // turn LED OFF
		digitalWrite(PIN7, LOW);
		break;
	case 3: // toggle LED
		digitalWrite(PIN7, digitalRead(PIN7) == LOW);
		break;
		//case 4: // put other instructions here; break;
	}
}
This function tests received instruction by calling exec.Instruction() method. Function returns the first data byte from received message as this is defined as instruction.
LED will turn ON if instruction is 0x01, turn OFF when 0x02 and toggle on 0x03.
To send this control message in Hapcan Programmer use monitor window.

Choose 0x10A frame, then make sure You put proper group and node instead of XX XX bytes, and set instruction at byte 5 (I've put 0x03 here for toggle). Each time You send this message to the BUS, LED will toggle.
Cool, now our device can perform simple action. But, the other devices in Hapcan bus want to know when LED state changes. Let's go to Status request example.