-
Notifications
You must be signed in to change notification settings - Fork 0
Home
SimpleSAMLphp module to use WordPress as a SAML 2.0 Identity Provider.
WordpressAuth is a SimpleSAMLphp authentication module, that allows to use the WordPress user database as the authentication source. The code was written for MySQL/MariaDB.

- SimpleSAMLphp
2.1- Tested with SimpleSAMLphp
2.0.5,2.0.6,2.1.0
- Tested with SimpleSAMLphp
- WordPress
- Tested with WordPress
6.3*
- Tested with WordPress
- MariaDB/MySQL
- Tested with MariaDB
11.0.3*
- Tested with MariaDB
*Backward compatible.
When authentication occurs, the visitor is redirected to the Identity Provider (IdP) for login. Therefore, upload the wordpressauth folder and its contents into the module folder on your IdP.
/var/simplesamlphp/modules/
This is the default installation path. If your path is different, select the appropriate path.
Let's download, unzip and move the needed files to it's destination. Choose the tool you prefer.
Open the right path:
cd /var/simplesamlphp/modules/
Download the repository via cURL
sudo curl -LJO https://github.com/disisto/simplesamlphp-wordpressauth/archive/refs/heads/master.zip
Unzip the downloaded repository
sudo unzip simplesamlphp-wordpressauth-master.zip
Move the desired folder to the correct path
sudo mv simplesamlphp-wordpressauth-master/wordpressauth/ .
Delete the unnecessary files
sudo rm -R simplesamlphp-wordpressauth-master*
Open the right path:
cd /var/simplesamlphp/modules/
Download the repository via wget
sudo wget https://github.com/disisto/simplesamlphp-wordpressauth/archive/refs/heads/master.zip
Unzip the downloaded repository
sudo unzip master.zip
Move the desired folder to the correct path
sudo mv simplesamlphp-wordpressauth-master/wordpressauth/ .
Delete the unnecessary files
sudo rm -R simplesamlphp-wordpressauth-master/ master.zip
Open the right path:
cd /var/simplesamlphp/modules/
Download the repository via git
sudo git clone https://github.com/disisto/simplesamlphp-wordpressauth.git
Move the desired folder to the correct path
sudo mv simplesamlphp-wordpressauth/wordpressauth/ .
Delete the unnecessary files
sudo rm -R simplesamlphp-wordpressauth/
In order to enable the module, we need to adjust the config.php and adjust the following entry:
File: /var/simplesamlphp/config/config.php
from:
    'module.enable' => [
        'exampleauth' => false,
        'core' => true,
        'admin' => true,
        'saml' => true
    ],
to
    'module.enable' => [
        'wordpressauth' => true,
        'exampleauth' => false,
        'core' => true,
        'admin' => true,
        'saml' => true
    ],
This can be done comfortably with the stream editor sed.
Enable module:
sed -i "/ 'module.enable' => \[/a\ 'wordpressauth' => true," /var/simplesamlphp/config/config.php
Disable module:
sudo sed -i "/'wordpressauth' => true/d" /var/simplesamlphp/config/config.php
In this section we need to provide the database credentials so that our Identity Provider (IdP) can access it.
File: /var/simplesamlphp/config/authsources.php
from:
    'admin' => [
        // The default is to use core:AdminPassword, but it can be replaced with
        // any authentication source.

        'core:AdminPassword',
    ],
to
    'admin' => [
        // The default is to use core:AdminPassword, but it can be replaced with
        // any authentication source.

        'core:AdminPassword',
    ],

    'wpauthinstance' => [
        'wordpressauth:WordpressAuth',
        'dsn'         => 'mysql:host=localhost;port=3306;dbname=<DATABASE NAME>',
        'username'    => '<DATABSE USERNAME>',
        'password'    => 'DATABSE PASSWORD>',
    ],
Locate the actual hostname of the server hosting your MySQL/MariaDB database and replace the placeholder localhost with this hostname.
If your MySQL/MariaDB instance is configured to use a port other than 3306, modify the entry 3306 with the appropriate port number.
Within your WordPress wp-config.php file, find the entry for the database name and replace the placeholder <DATABASE NAME> with the actual name of your database as specified in the wp-config.php.
Similarly, within the wp-config.php file, identify the entry for the database username and replace <DATABASE USERNAME> with the real database username from your wp-config.php.
Lastly, in your wp-config.php file, locate the entry for the database password and replace <DATABASE PASSWORD> with the accurate database password associated with your WordPress installation.
Now we just need to tell the Identity Provider (IdP) to use our new authentication source for the next login.
File: /var/simplesamlphp/metadata/saml20-idp-hosted.php
'auth' => 'example-userpass',
to
'auth' => 'wpauthinstance',
Switch to wpauthinstance:
sudo sed -i "s/'auth' => 'example-userpass',/'auth' => 'wpauthinstance',/" /var/simplesamlphp/metadata/saml20-idp-hosted.php
Switch to example-userpass:
sudo sed -i "s/'auth' => 'wpauthinstance',/'auth' => 'example-userpass',/" /var/simplesamlphp/metadata/saml20-idp-hosted.php
Congratulations! 🎉 If you now request the login prompt, you will authenticate against your WordPress database.
Both your Service Provider (SP) and your Identity Provider (IdP) instance should now be able to authenticate against the WordPress database using the valid credentials.
You can run the test under the following tab in the SimpleSAMLphp admin menu:
https://<-your-domain->/module.php/admin/test
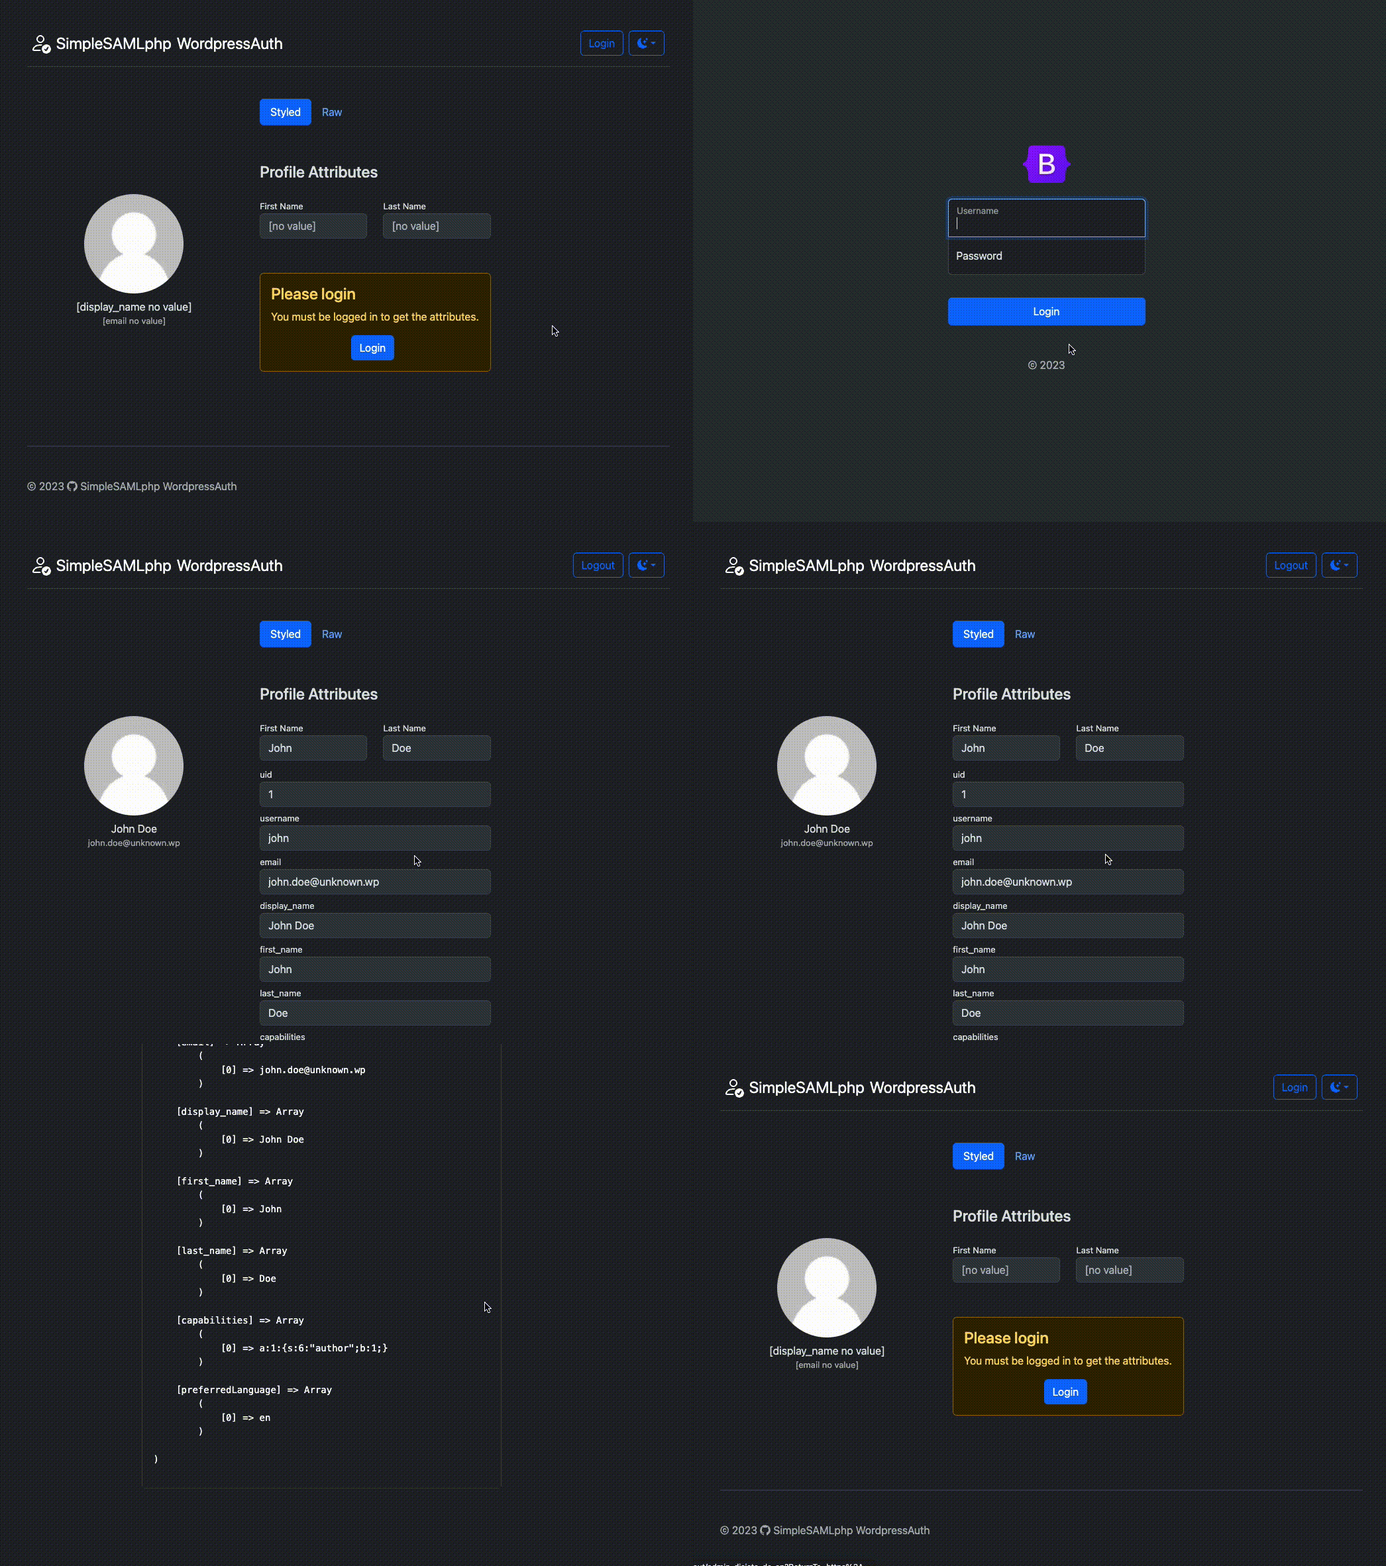
In addition, the file simplesamlphp-sp-demo-app.php is located in the tests folder. Upload the file to the location where the magic will take place and play around with it.
Big thanks to Oliver Maerz for the initial inspiration and Financial-Edge for the extensions to the original.
This project is not affiliated with SimpleSAMLphp, WordPress and/or MariaDB.
All mentioned trademarks are the property of their respective owners.