By the end of this lesson, you should be able to:
- Define HTML
- Understand Basic HTML Syntax
- Use Basic HTML Syntax
We've completed the basics of how to code with JavaScript. Our hope is that you have some idea of how a program goes from conception to working code.
This module is only an introduction to HTML and CSS. HTML and CSS are the building blocks of everything you see on the web. HTML and CSS are not programming languages, as they do not involve logic. HTML is the raw data that makes up a webpage: tables, lists, input and output boxes. CSS is adds style to the raw data. However, we may want to apply the programming logic we have learnt to manipulate and change what is displayed on the browser - we will see how to do that in Module 6.
{% hint style="info" %} When we learnt JavaScript, we first learnt the programming concepts before we learnt the specific syntax. This will be the same for HTML and CSS. We will not be exploring all HTML elements or all CSS styles and syntax, that would be like trying to learn a new human language by reading the dictionary and memorising every word. Try not to worry about learning and knowing all possible HTML attributes or all style properties. Instead, try to approach it with creative discovery: _"How can I achieve this effect or style?" ._Try to achieve something new, and read new code. Embrace creative discovery! {% endhint %}
HTML stands for Hyper Text Markup Language. In the same way you can use certain tags to make words bold, italic, or strikethrough in a text messaging app like WhatsApp, HTML defines tags that mark-up plaintext files to be formatted differently when opened by a browser application.
All browsers have an HTML engine built in that can read and interpret the syntax in an HTML file.
Tags tell the browser what type of elements are on the page and also how those elements relate to each other. Just like an editor would mark up content of an article, a programmer can mark up a web page by using tags and attributes.
The first thing to learn is the proper syntax of a basic HTML page. HTML uses tags wrapped around content to control the flow and look.
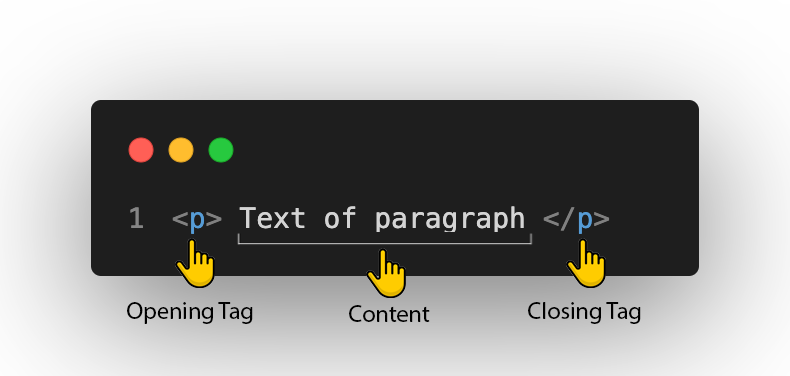
For example, a paragraph tag is used to surround the text of the paragraph and let the browser know that it is a paragraph. The browser then applies its default styling to the paragraph. The paragraph tag looks like this:
The <p> is called the opening tag and the </p> is called the closing tag. Both must be included to tell the browser where the paragraph begins and ends. What is written between the tags is displayed on the browser page, not the tags. Most tags have an opening and closing tag with the content in between.
Tags are generally nested inside each other to maintain structure and flow of content.
These are some common HTML elements, and their tags:
| HTML Tag | Element |
|---|---|
| A div, or division, is a generic container for HTML elements. | |
| <p> | A paragraph. A new line is automatically added before and after a paragraph. |
| <b>, <i> | Bold, italics. Usually used within another HTML element, like <p> or <div> |
| <h1> to <h6> | Used to defined headers on a page. |
| <button> | Buttons! |
| <input> | An input field where user can enter data. |
| <a> | Anchor, used to link other pages or website. |
You can explore more HTML elements and tags here.
HTML elements have _attributes; a_n attribute is used to define the characteristics of the element and is placed inside the element's opening tag. All attributes are made up of two parts − a name and a value.
An ID is a unique identifier for an HTML element. Only one ID can be applied to an element, though if you break this rule you won't get any errors, maybe just some unintended behaviours. Having a unique ID allows for a user to programmatically select and manipulate the associated element**,** which we will learn how to do later.
<p id="player-card-one">ace of spades</p>
The style attribute allows us to define how the element appears on the screen. For example, if we wanted to change the font color of our paragraph element, we might do so using the style attribute like this:
<p style=“colour: red;”> This text would be red </p>In this case, the name of the attribute is style and the value is "color: red", which can be confusing. In earlier versions of HTML, there was a colour attribute, and a different attribute for background-colour, and so on, which were all eventually subsumed under the style attribute. This requires the value of the style attribute to specify what style property is being defined. The style attribute also allows for the defining of other properties, such as changing the font-size or adding a border to an element. We will learn more about styling next.
- In any of your HTML files, add a new HTML element.
- Edit the element's background colour using the style attribute.
