[TOC]
这是一个从头写到尾的傻瓜式安装教程,内容略枯燥繁琐,请谨慎阅读。
寒假在家基于星际2实现micromanagement 的DRL代码,但是由于以往论文都是针对星际1,针对星际1的地图,有足够多的方法和模型间的对比数据,而星际2上的工作相对较少(基于星际2的多agent工作应该还没有),模型之间孰优孰劣不易比较,因此决定搭建星际1环境,进而比较模型胜率。
现有的星际1环境搭建需要两台主机,官方推荐 (1)windows 搭建SC:BW游戏环境作为Server端,负责游戏渲染并监听来自client端的commands输入;(2)Linux 基于TorchCraft,接收来自Server的环境观察(state)并发送回指令操作(actions)。server与client之间基于 ZeroMQ通信。
但是使用两台主机操作繁琐不便,因此决定将环境统一部署到同一台Windows主机(也是因为在家资源有限...),由于安装过程实在繁琐,故写下此文以备查看,在这里同时提供windows(x64)下安装环境所需的 ++.dll++ 与 ++torchcraft-1.4.0-cp35-cp35m-win_amd64.whl++ / ++torchcraft-1.4.0-cp36-cp36m-win_amd64.whl++文件下载,有需要的童鞋可以自行下载,省去自行编译过程。
系统:Windows 10 x64
CPU:CORE i7 7th
内存:16G
显卡:GTX 1060
下载文件(zip),解压缩到任意目录下即可,解压缩目录记为 $STARCRAFT。
下载最新发布版本安装包,安装到目录 $STARCRAFT\BWAPI。
安装完成,$STARCRAFT目录下多出以下两个文件
- BWAPI
- bwapi-data
下载最新发布版本 release
- Copy
$STARCRAFT/TorchCraft/config/bwapi.iniin$STARCRAFT/bwapi-data/bwapi.ini. - Copy
$STARCRAFT/TorchCraft/config/torchcraft.iniin$STARCRAFT/bwapi-data/torchcraft.ini. - Copy
$STARCRAFT/TorchCraft/BWEnv/bin/*.dllinto$STARCRAFT/ - Copy
$STARCRAFT/TorchCraft/maps/*into$STARCRAFT/Maps/BroodWar
- Extract
BWEnv.dllfrom the latest archive in the release page and put it in$STARCRAFT - Run
$STARCRAFT/BWAPI/ChaosLauncher/Chaoslauncher-MultiInstance.exeas administrator. - Check the “RELEASE” box from BWAPI.
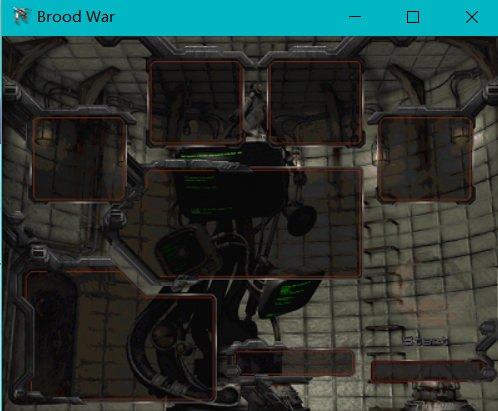
- Click Start.
Server端安装到此结束。
引自官方一段话:
TorchCraft is a BWAPI module that sends StarCraft data out over a ZMQ connection. This lets you parse StarCraft data and interact with BWAPI from anywhere. The TorchCraft client should be installed from C++, Python, or Lua. We provide off the shelf solutions for Python and Lua.

可以发现,TorchCraft 并没有直接提供Windows下python扩展包,从原码包直接编译安装需要c/c++编译环境,所以相对于Linux下,Windows安装过程较为曲折。
如果恰好你也是win10(x64, python 3.5/3.6),可跳过编译安装,到免编译安装部分。
- Python 3 (我这里用的python3.5)
- Windows c/c++编译环境 MinGW-w64
- zstd lib [压缩算法]
- Zeromq4+ [Server/Client通信基础]
- Microsoft Visual Studio 2013+ (2017下载链接)[编译 zstd/ZeroMQ]
TorchCraft 用到了 c++ 11,msvs 对 c++11 支持很不友好,故安装 MinGW,但是torchcraft同时用到pthread线程库,mingw-32 不支持,所以目前选择安装 MinGW-w64。
- 详细安装见 链接
- 记得配置环境变量
%MINGW_64_HOME%\bin
下载安装即可
- TorchCraft编译安装,只用到 libzmq.dll和 zmq.h 官方已给出 windows下的 Stable Release 4.0.4 ,自行下载安装即可。
- TorchCraft的发行版zip包中,bin目录下有 libzmq.dll。
自行编译安装详见以下两篇博客
- TorchCraft编译安装,只用到了 libzstd.dll 和 zstd.h。
- 官方已给出 windows下的发行版本 releases,自行下载安装即可。
自行编译安装详见 zstd github
-
目录:
%Conda_home%\envs\XXX\Lib\distutils(这里用的Conda) -
新建文件
distutils.cfg
文件内容:[build] compiler = mingw32 -
编辑
cygwinccompiler.py修改class Mingw32CCompiler(CygwinCCompiler)# 修改 1: if sys.maxsize == 2**31 - 1: ms_win=' -DMS_WIN32' else: ms_win=' -DMS_WIN64' self.linker_dll='g++' self.set_executables(compiler='g++ -O -Wall'+ms_win, compiler_so='g++ -mdll -O -Wall'+ms_win, compiler_cxx='g++ -O -Wall'+ms_win, linker_exe='g++', linker_so='%s %s %s' % (self.linker_dll, shared_option, entry_point)) # 修改 2: # Include the appropriate MSVC runtime library if Python was built # with MSVC 7.0 or later. # self.dll_libraries = get_msvcr()
- 记TorchCraft源码目录为
$TorchCraft - 修改
%Conda_home%\envs\XXX\include\Python.h,在最开始加入#include "math.h",否则会出现:error: '::hypot' has not been declared - 拷贝
zmq.h,zstd.h到$TorchCraft\include\ - 拷贝
libzmq.dll,libzstd.dll到%Conda_home%\envs\XXX\libs - 如果是
git clone下载的源码包,Remember to init submodules:git submodule update --init --recursive,下载 client模块 - 可能需要更新一下 steuptools 与 pip:
python -m pip install -U pip setuptools - cd
$TorchCraft, Python setup:pip install pybind11 && pip install .
出现以下则安装成功:
- 最后,在python中使用torchcraft前,需要将
libzmq.dll,libzstd.dll拷贝到%Conda_home%\envs\XXX\Lib\site-packages\
- 安装 MinGW-w64 c/c++ 环境(见上)
- ZeroMQ
- ZSTD
- TorchCraft
- 将
libzmq.dll,libzstd.dll拷贝到%Conda_home%\envs\XXX\Lib\site-packages\ pip install path_to_torchcraft-1.4.0-cpxx-cpxx-win_amd64.whl
Client端安装到此结束。
cd $TorchCraft(TorchCraft 源码目录)cd examples/python py/example.py -t 127.0.0.1
训练算法还是放在服务端比较好,server端windows只用来运行环境。
安装 zstd(压缩算法)
下载release版本安装 GitHub
直接运行 make install (create and install zstd cli, library and man pages)

我这里是机器上没有root权限,所以要指定目录安装。
make DESTDIR=xxxx install
安装 zero-MQ
下载release版本安装 GitHub
configure --prefix=xxxx
make install
注意,GCC/G++编译时只会查找系统默认的include和link的路径(/usr/lib:/usr/local/lib等),这里如果不是以root身份安装,需要手动将zstd与zeromq的include(c/c++头文件)、lib(.a/.so 静态链接库,动态链接库)等目录位置添加到相应的环境变量中。 后面编译安装TorchCraft Client需要。
详情参考:
下载release版本安装 GitHub
- 确保 zstd与zeromq相关头文件及库文件已添加至相应环境变量中。
- 下载并解压TorchCraft压缩包,切入主目录,Python setup:
pip install pybind11 && pip install.


