- On the first run, the application will create a
Settings/Twitch.jsonfile. - Add your
clientidandclientsecretobtained from your Twitch Developer account (or provided to you by CatGirlEddie to theSettings/Twitch.jsonfile).
If you prefer setting this up yourself, see the Authentication section - On the second run, the application will automatically authorize through Twitch and save an access token and refresh token to
Settings/Twitch.json.
{
  "Twitch": {
    "ClientId": "your-client-id",
    "ClientSecret": "your-client-secret",
    "AccessToken": "",
    "RefreshToken": "",
    "Scopes": [
      "bits:read",
      "channel:manage:polls",
      "channel:manage:redemptions",
      "channel:read:hype_train",
      "channel:read:polls",
      "channel:read:redemptions",
      "channel:read:subscriptions",
      "channel:read:vips",
      "chat:edit",
      "chat:read"
    ]
  }
}If you prefer setting Twitch up yourself without our assistance, please follow the following steps:
- Using your browser, navigate to the Twitch Developer Console
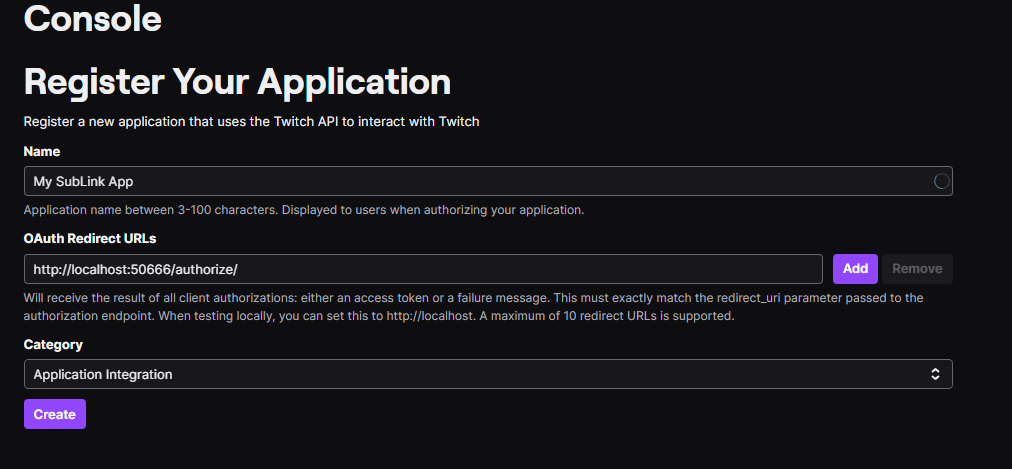
- Register a new
Application - Give it a fitting
NamelikeMy SubLink App, addhttp://localhost:50666/authorize/asOAuth Redirect URLand set theCategorytoApplication Integration

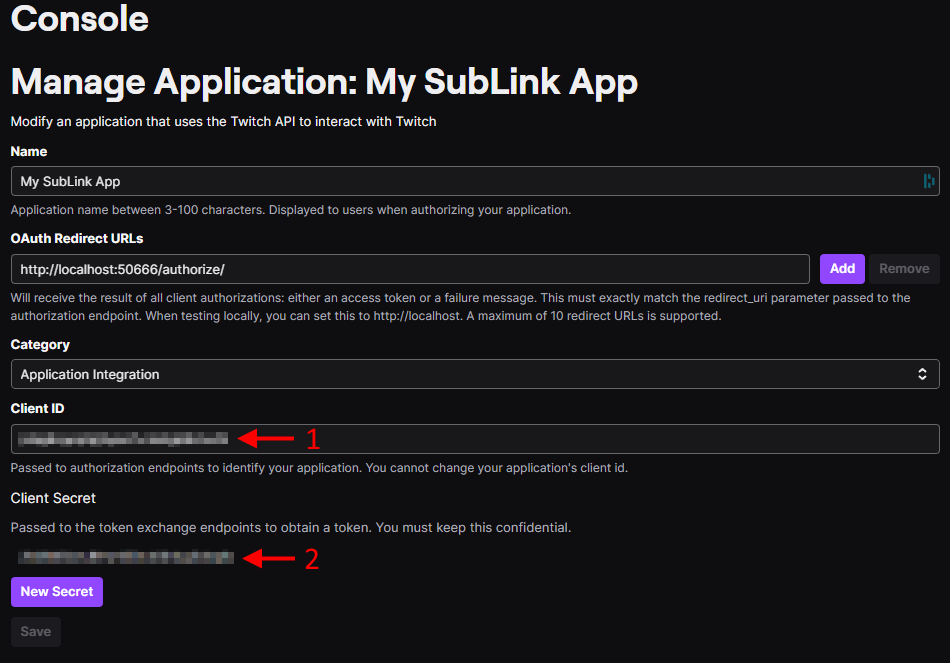
- Click
Managebehind the newly generated application

- Copy the
Client ID(1) into yourSettings/Twitch.json - Click
New Secret, confirm the pop-up and copy the generated value (2) into yourSettings/Twitch.json
