These instructions describe how to create a button on the client's order sheet that will automatically confirm the order. When the button is clicked, it will execute a script which renames the order spreadsheet file, enables the sheet to be viewed with a link, creates empty directories for the client (named after the file), and submits a command to the production email address.
Each Google Sheets file has an embedded Apps Script project. The confirm order code needs to be added to this project so that the order sheet can access it.
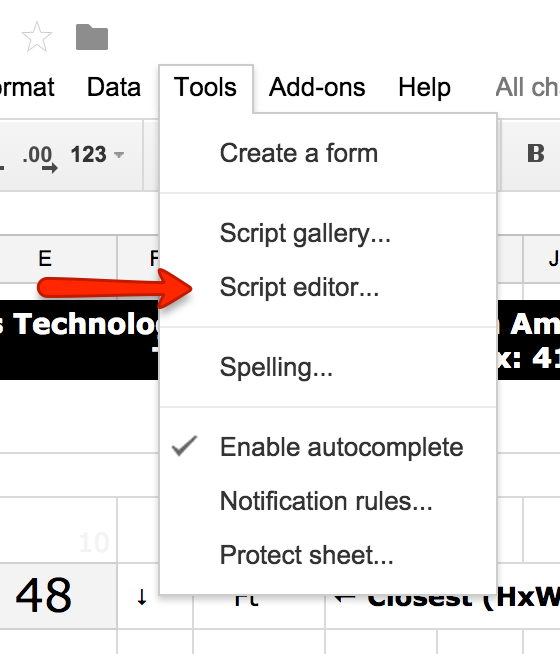
Open the Google Sheets editor with the sheet you want to edit and select Tools > Script editor....
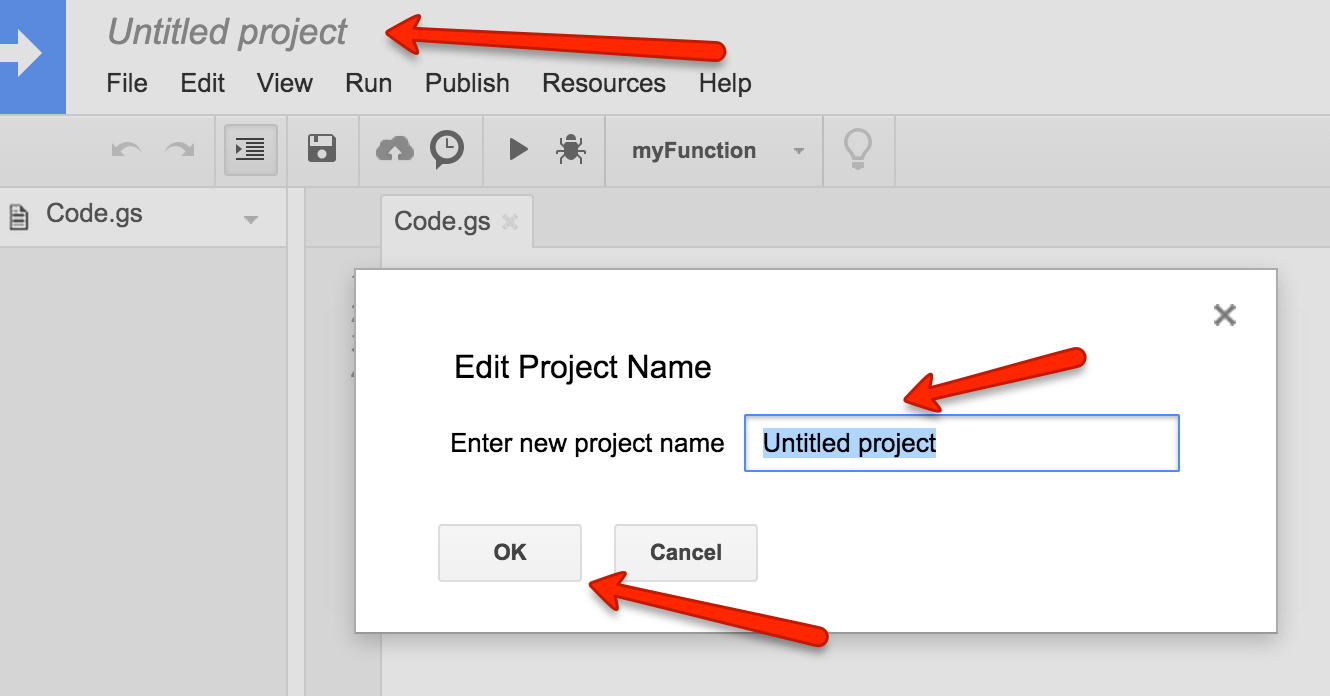
Change the name of the project to something descriptive, such as "Confirm Order".
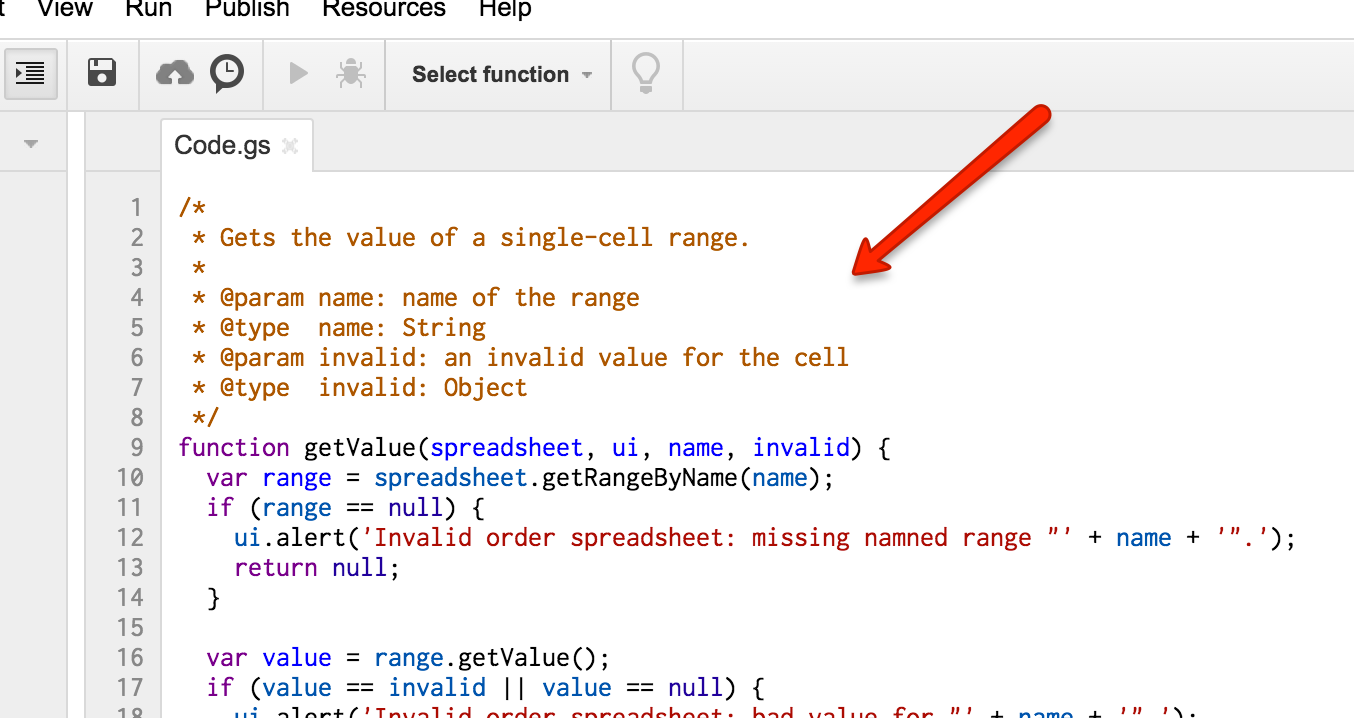
Copy the code from the sendConfirmOrder.gs script on GitHub and paste it into the Code.gs script in the open project.
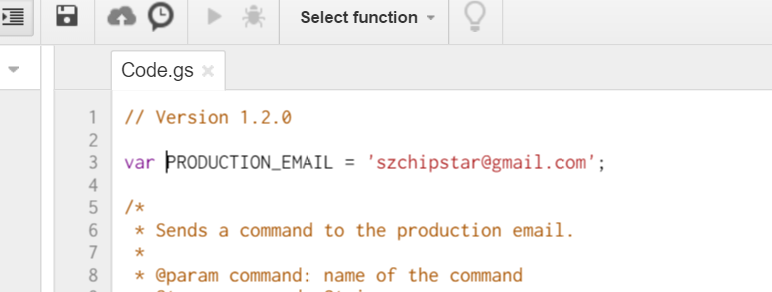
Change the email address near the bottom of the script to match the production email address and save the script.
The script reads information from the order sheet by checking the value of named cell ranges. These named ranges serve as identifiers for particular information in the script.
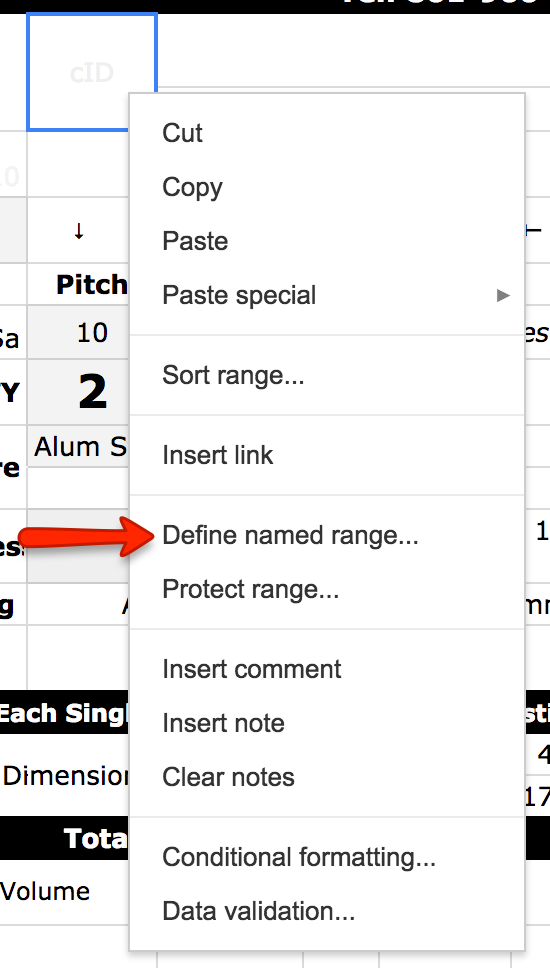
Back in the order sheet, right click on the cell that contains the customer code and select Define named range....
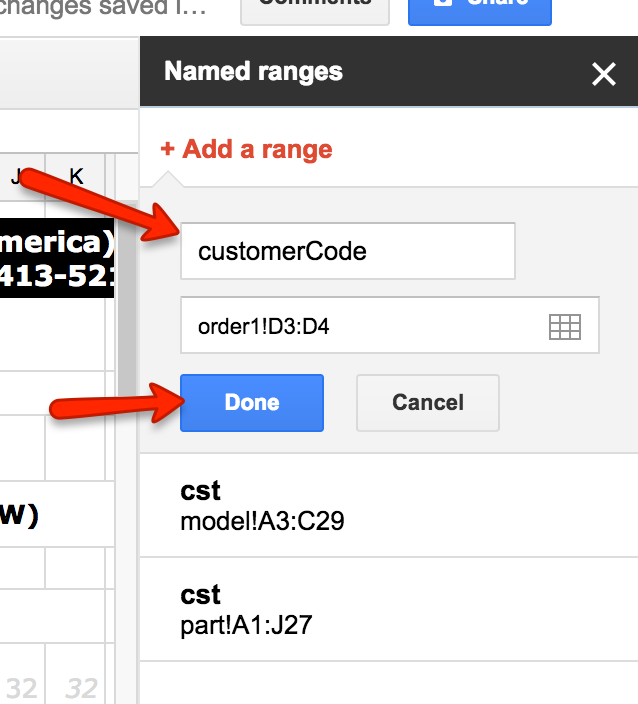
Change the name of the cell range to customerCode and click Done. It is very important that you use this exact name for the script to work.
Right click on the cell that contains the project name and select Define named range....
Change the name of the cell range to projectName and click Done. It is very important that you use this exact name for the script to work.
Right click on the cell that contains the customer order number and select Define named range....
Change the name of the cell range to orderNum and click Done. It is very important that you use this exact name for the script to work.
A button needs to be available in the order sheet to allow users to execute the confirm order logic.
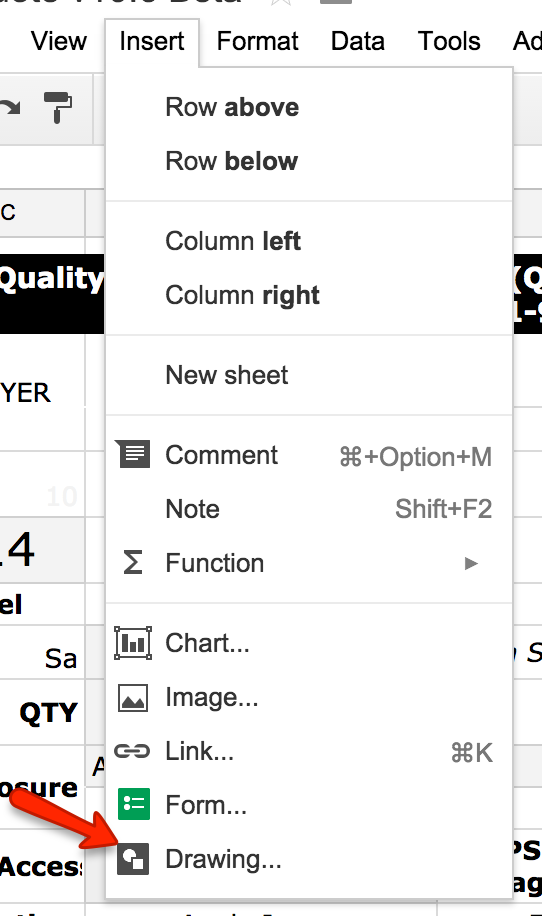
Select Insert > Drawing....
Draw the button to look however you want. After saving and closing the drawing, move it into position on the sheet. It canont be embedded in a cell.
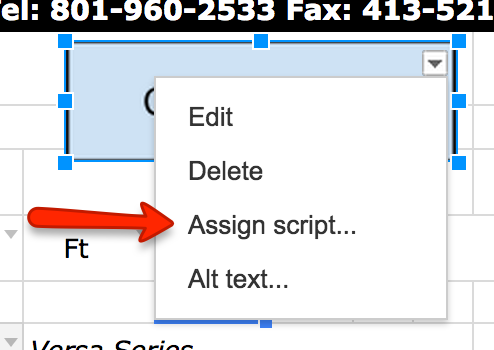
Click on the arrow in the top-right corner of the button, then select Assign script... from the dropdown menu.
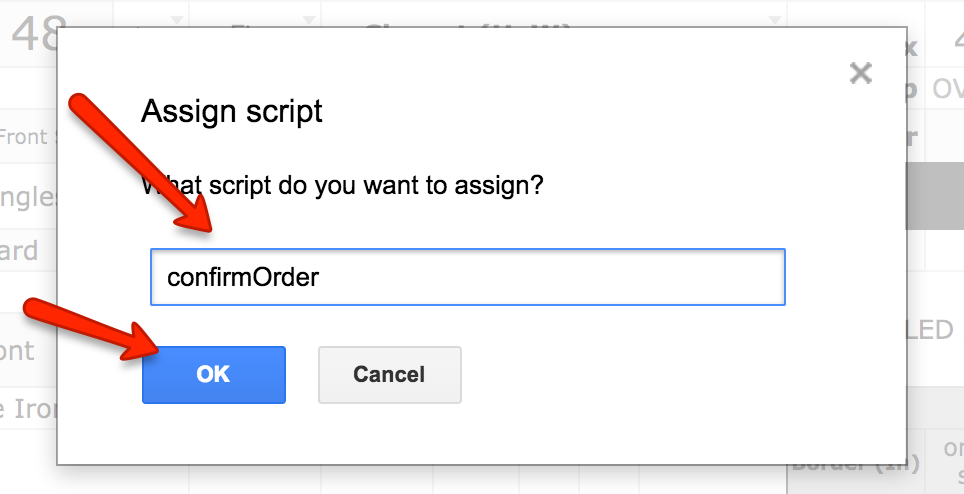
Enter the function name confirmOrder into the dialog and select OK. The confirmOrder function will be called every time the button is clicked, enabling the script to execute.
These instructions describe how to setup the production GMail account to respond to command emails. Command emails are sent when a client account attempts to execute logic on the production account, since they do not have direct access.
The email command listener script only inspects emails with the command label. When they are finished, the script re-labels them as executed. A filter will automatically label command emails so that the script can identify them. It will also archive the emails to keep the inbox clear.
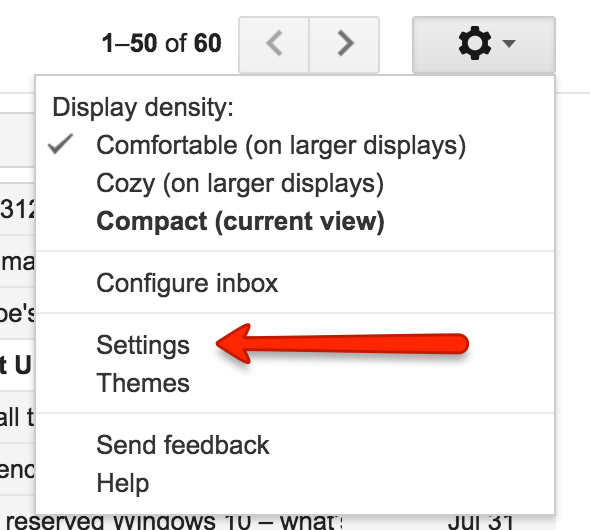
On the production GMail account, click on the gear button and choose Settings from the dropdown menu.
Click the Filters tab link at the top of the settings page.
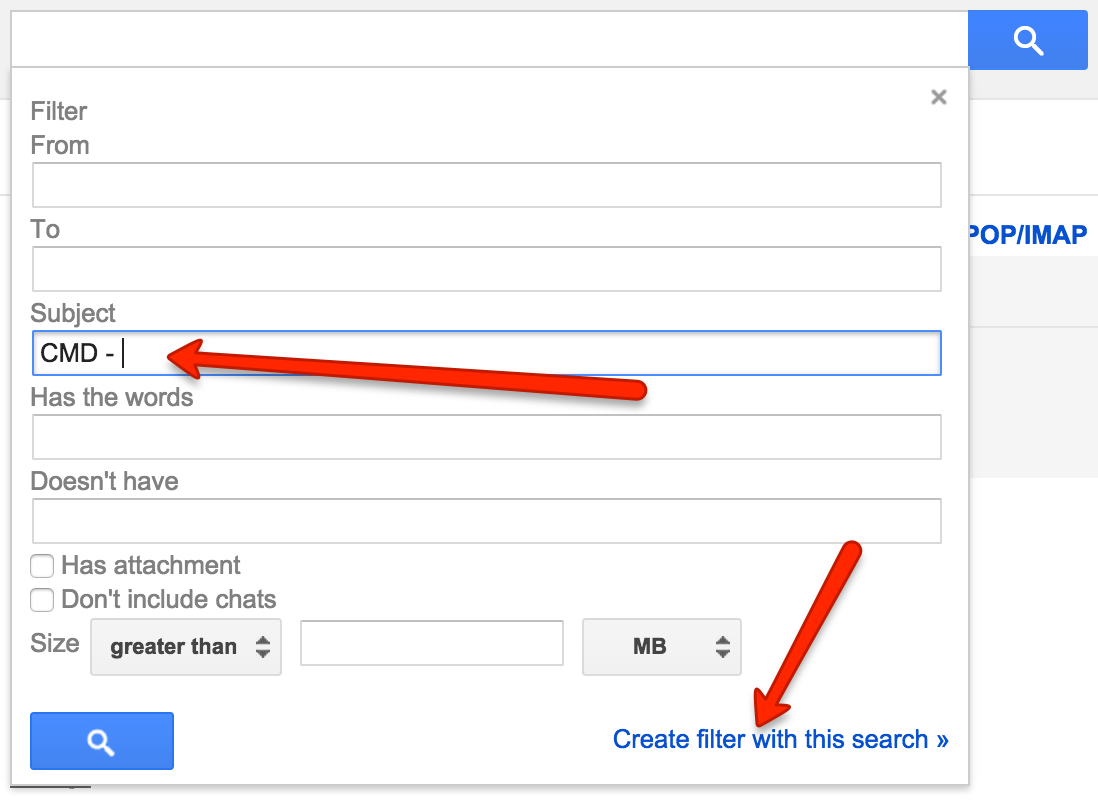
Click the Create a new filter button at the bottom-right corner of the page.
Enter CMD - into the Subject field of the filter creation dialog. This will cause the filter to only select emails with "CMD - " in the subject.
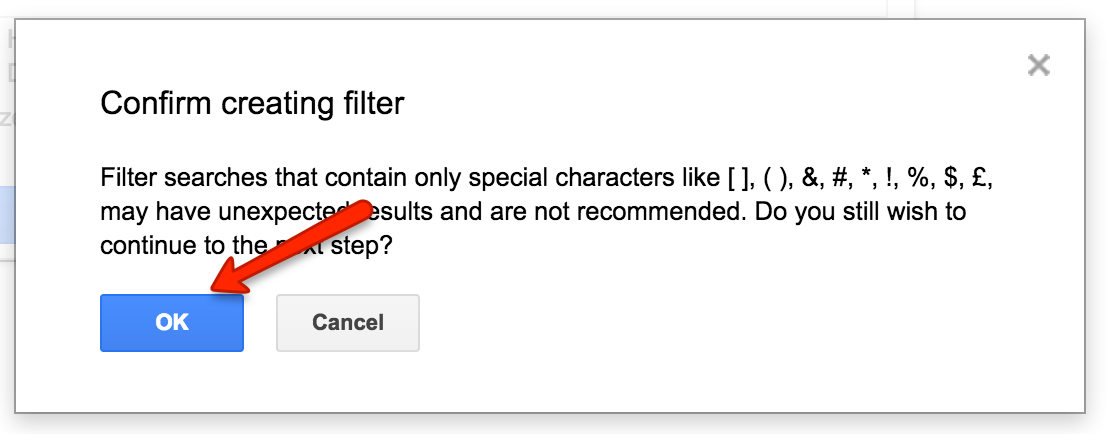
Select OK from the filter creation confirmation dialog.
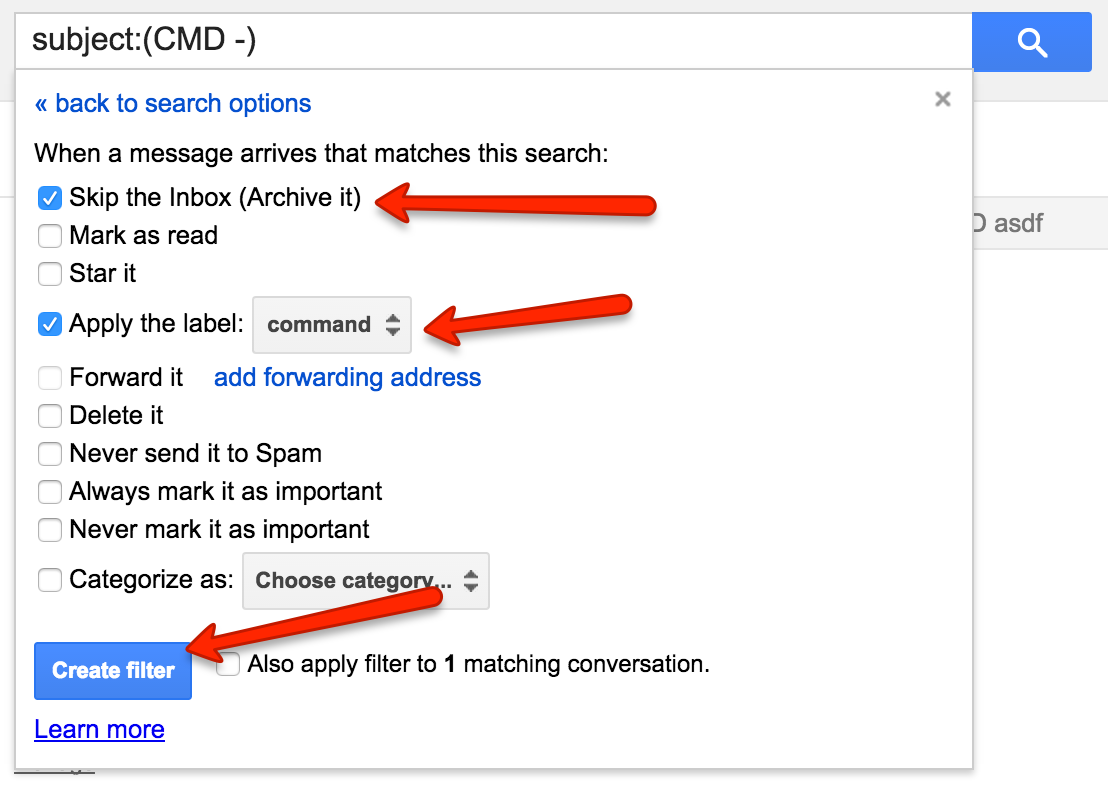
Check the Skip the Inbox (Archive it) and Apply the label: options. Choose command as the designated label. If the command label doesn't exist, create a new one. Be sure to use all lowercase letters. When the correct actions have been selected, click the Create filter button.
Unlike with the confirm order script, the email command listener script is not attached to any files. Instead, a new script file needs to be created and a trigger needs to be set to activate the script on a regular basis.
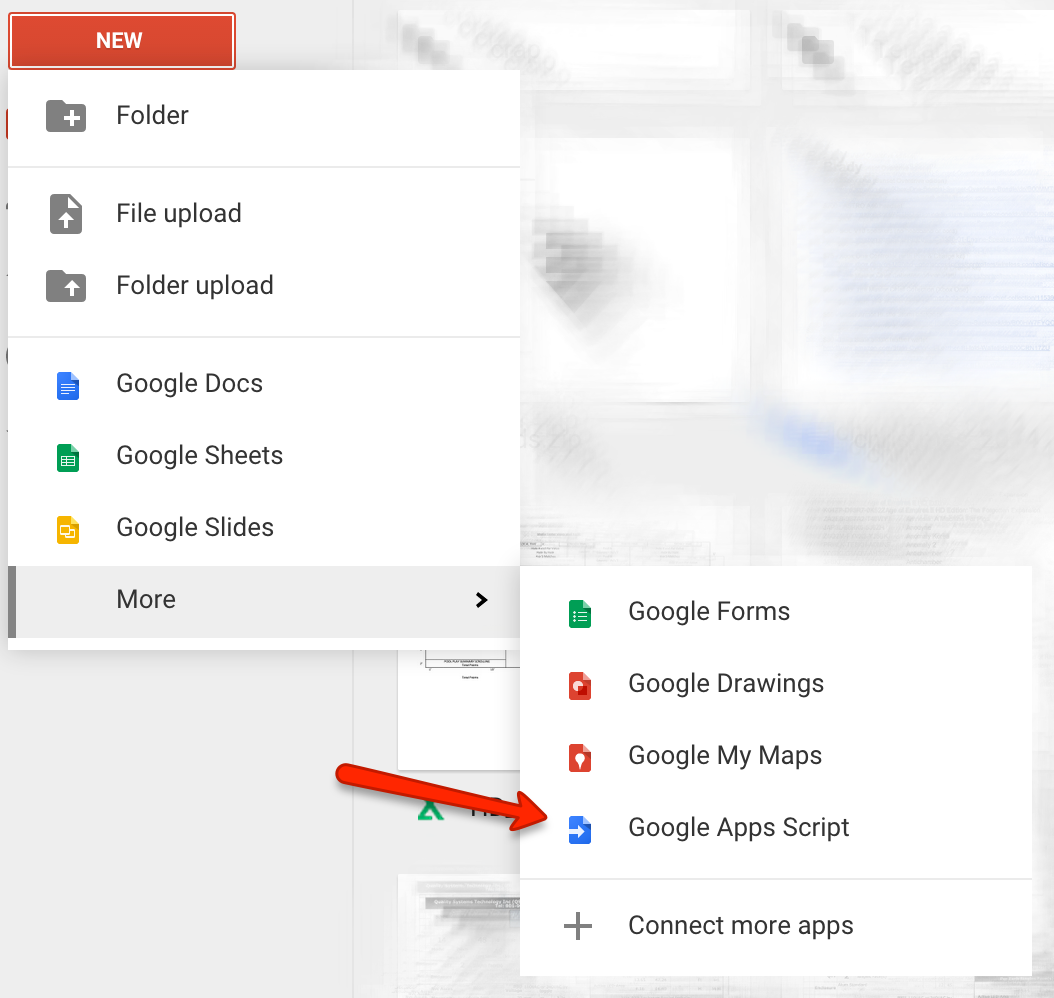
From Google Drive, select New > More > Google Apps Script.
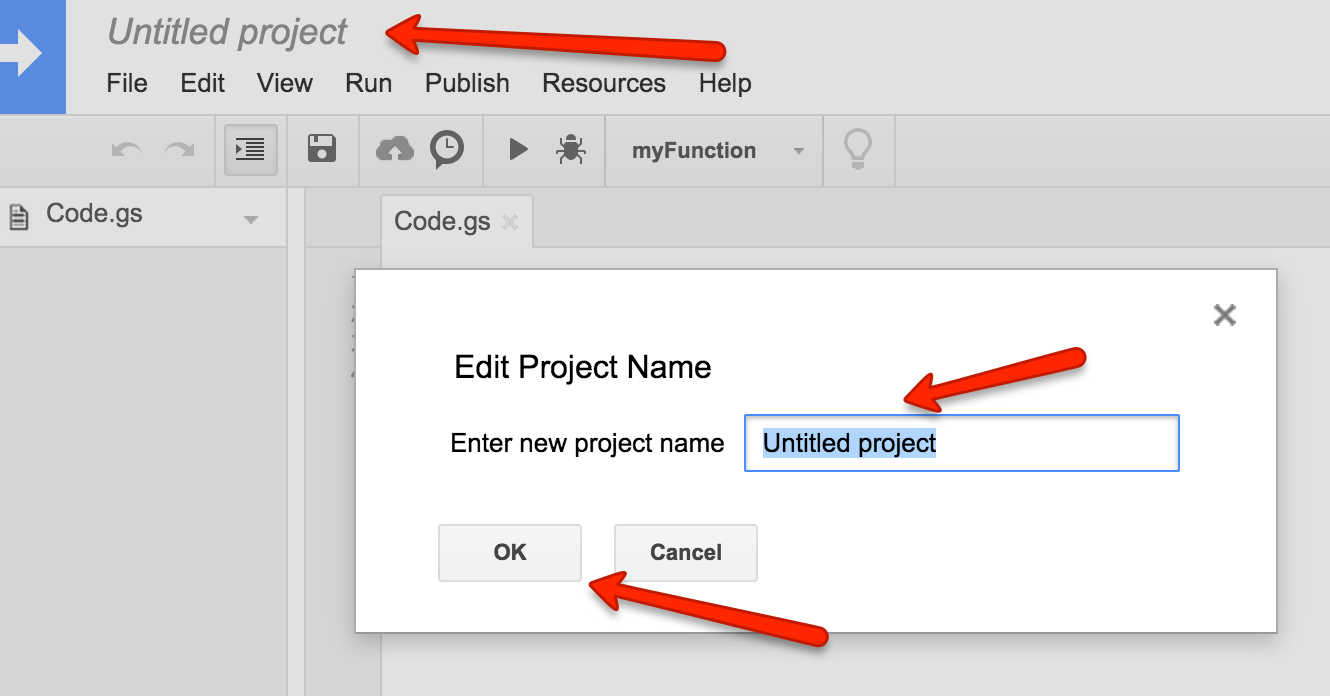
Change the name of the project to something descriptive, such as "Email Command Listener".
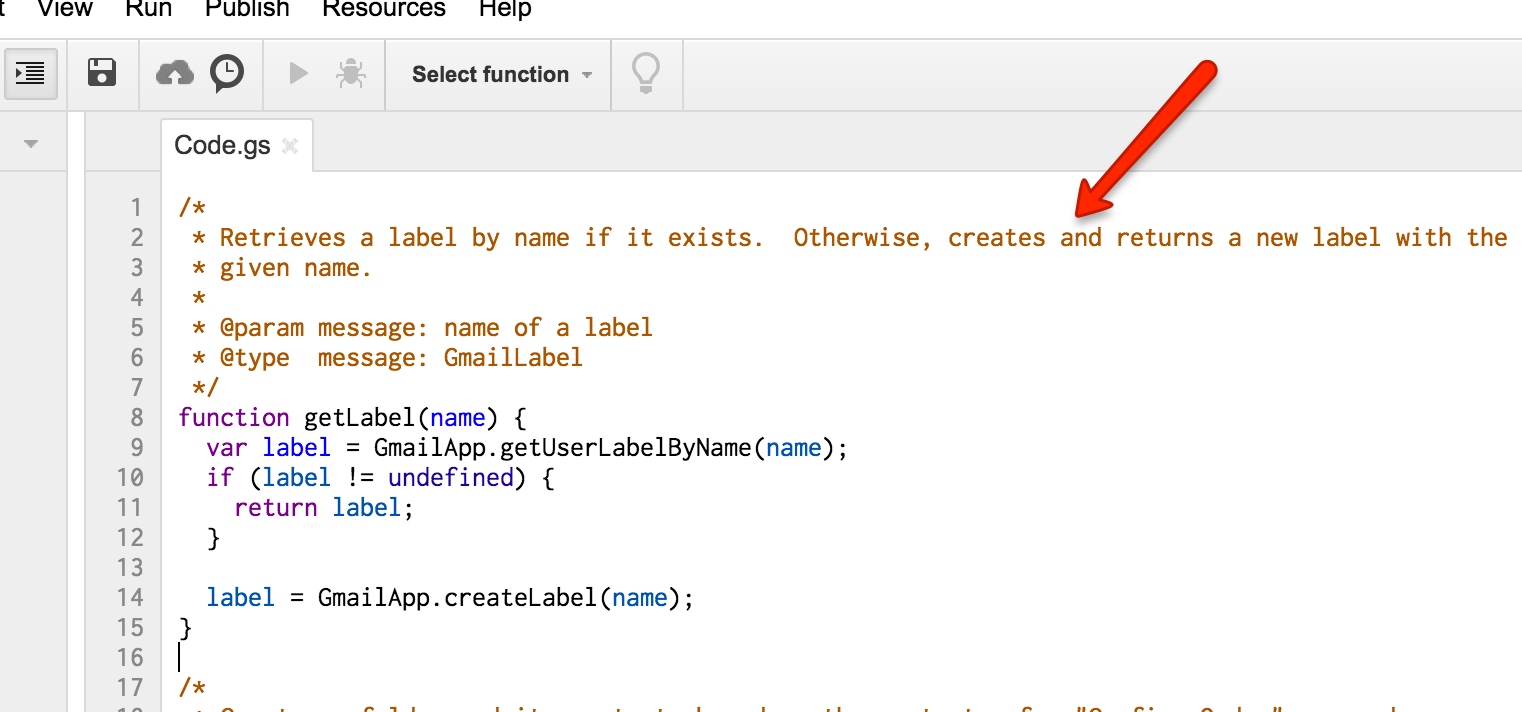
Copy the code from the emailCommandListener.gs script on GitHub and paste it into the Code.gs script in the open project.
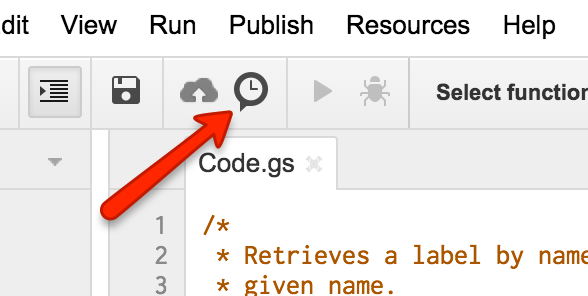
Click on the clock button to open the project triggers dialog.
Click the No triggers set up. Click here to add one now. link to create a new trigger.
Select emailCommandListener function to run as a Time-driven event on a Minutes timer Every minute. This will enable the script to execute every minute. Close the dialog with the Save button.
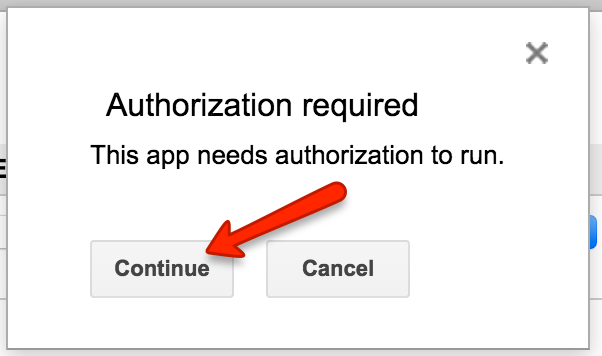
Before the script can start executing, you must authorize the script by continuing through two more dialogs.
For the script to completely function, a few files and folders need to exist with the correct names in the production account's Google Drive.
The production Google Drive should include the documents confirm order readme.txt, PR Template 模板, and Chipstar Schedule 订单进度 in the root directory as well as the folder 进行生产任务 Current Order. The PR Template 模板 file must be a Google Sheet which contains the named cell range orderFileId. The Chipstar Schedule 订单进度 file must be a Google Sheet which contains the named cell range orderFileIds.
