-
Notifications
You must be signed in to change notification settings - Fork 7
Configuring Plugin Settings
You need to configure the plugin before using it:
- In ReadyAPI, click Preferences on the toolbar:

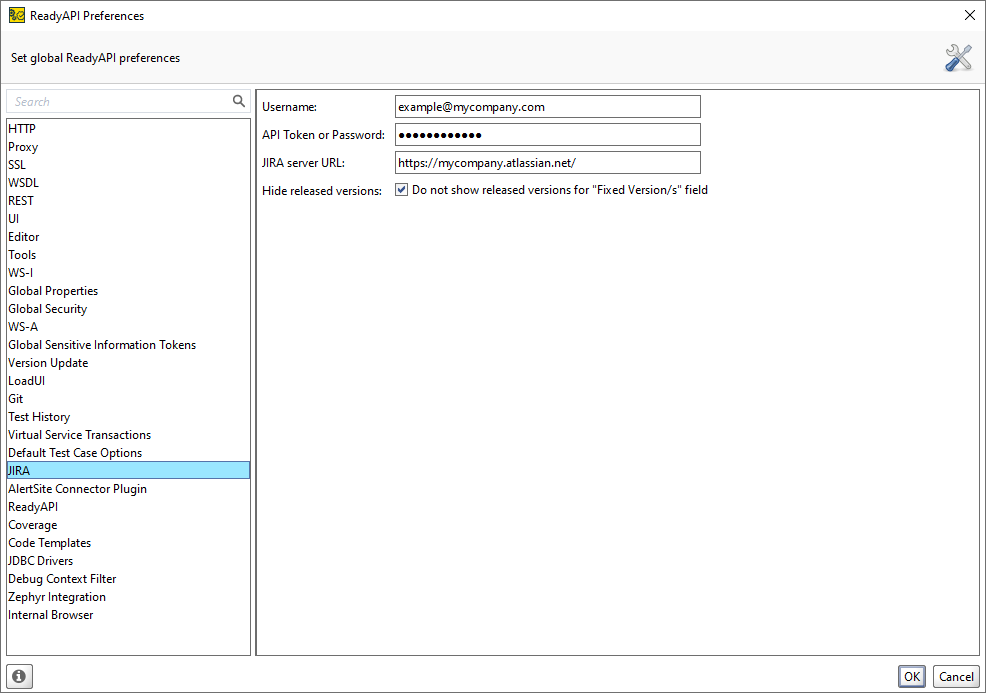
This will open the ReadyAPI Preferences dialog (see the image below).
- To view the plugin settings, select JIRA from the menu on the left of the dialog. You will see the settings on the right:

- Specify the following values:
-
Username – The email or username you use to log in to JIRA.
If you use JIRA Cloud, specify the email.
If you use JIRA Server, specify your user account. You can find the username in your JIRA profile settings.
-
API Token or Password – The password that you use for logging in.
Important: For JIRA Cloud users, API tokens are the only way to connect to JIRA from ReadyAPI. JIRA Server users can use either API tokens or passwords. For information on how to generate an API token, see https://confluence.atlassian.com/cloud/api-tokens-938839638.html.
-
JIRA server URL – The URL of the JIRA instance you use. If you do not know the URL, ask your system administrator for help.
Important: Make sure to enter the protocol name properly. JIRA SaaS uses https://, not http://. Specifying the HTTP protocol in the URL will cause issues.
-
Hide released versions - Enable this option to exclude released versions from the Fix Version field.
- Click OK to save the changes and to close the dialog.
Now the plugin is ready for work. See Creating JIRA Items for information on using the plugin.