-
Notifications
You must be signed in to change notification settings - Fork 17
UsageAsDependency
The utilities package can be used as dependency in other applications. This can be done in Maven by adding the following blocs in your pom file. Please replace X.Y.Z by the version of interest, e.g. 4.7.2.
<!-- The compomics utilities dependency -->
<dependency>
        <groupId>com.compomics</groupId>
        <artifactId>utilities</artifactId>
        <version>X.Y.Z</version>
        <exclusions>
</dependency>

<!-- UGent Genesis repository -->
<repository>
        <id>genesis-maven2-repository</id>
        <name>Genesis maven2 repository</name>
        <url>http://genesis.UGent.be/maven2</url>
        <layout>default</layout>
</repository>

<!-- old EBI repository -->
<repository>
        <id>ebi-repo</id>
        <name>The EBI internal repository</name>
        <url>http://www.ebi.ac.uk/~maven/m2repo</url>
</repository>

<!-- EBI repository -->
<repository>
        <id>pst-release</id>
        <name>EBI Nexus Repository</name>
        <url>http://www.ebi.ac.uk/Tools/maven/repos/content/repositories/pst-release</url>
</repository>
- Spectrum Panel
- Chromatogram Panel
- Isotopic Distribution Calculation
- In Silico Protein Digestion
- Proteomics Experiments Standardized Customizable Objects
- Automatic Generation of Data Access Code
- Amino Acid Sequence Mapping
For the complete source code of the demos see the com.compomics.util.examples package.
See also the compomics-utilities JavaDoc.
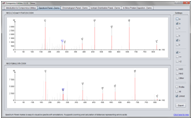
The SpectrumPanel makes it straightforward to visualize and manipulate annotated MS spectra. Various ways of interacting with the spectra are supported, including zooming and peak picking.
To use the SpectrumPanel in your project do the following:
    // create spectrum panel
    SpectrumPanel spectrumPanel = new SpectrumPanel(
        "your mzValues",               // double [] of mz values
        "your intensity values",       // double [] of intensity values
        "your precursor mz value",     // double with precursor mz
        "your precurorCharge",         // String precursor charge
        "your file name");             // String spectrum file name


    // set up the peak annotation
    Vector<DefaultSpectrumAnnotation> peakAnnotation = new Vector();
    peakAnnotation.add(
        new DefaultSpectrumAnnotation(
            175.119495,                                // the mz value to annotate
            -0.0068229,                                // the mz error margin
            SpectrumPanel.determineColorOfPeak("y1"),  // the annotation color
            "y1"));                                    // the annotation label
    ...


    // add the annotations to the spectrum
    spectrumPanel.setAnnotations(peakAnnotation);

    // add the spectrum panel to the parent frame or dialog
    parentJPanel.add(spectrumPanel);
    parentJPanel.validate();
    parentJPanel.repaint();
Reference Areas
Reference areas can be added to the SpectrumPanel.
X-axis:
spectrumPanel.addReferenceAreaXAxis(new ReferenceArea(
    "1",         // reference area unique identifier
    "A",         // reference area label
    200,         // start of area
    250,         // end of area
    Color.blue,  // color of area
    0.1f,        // transparency level
    false,       // drawn on top of or behind the data
    true));      // draw the label
Y-axis:
spectrumPanel.addReferenceAreaYAxis(new ReferenceArea(
    "2",
    "Low",
    0,
    500,
    Color.ORANGE,
    0.3f,
    false,
    true));
To remove a reference area:
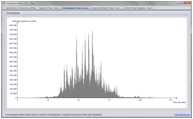
spectrumPanel.removeReferenceAreaXAxis("1");The ChromatogramPanel makes it straightforward to visualize chromatograms. Various ways of interacting with the chromatograms are supported, including zooming and peak picking.
To use the ChromatogramPanel in your project do the following:
    // create the chromatogram panel
    ChromatogramPanel chromatogramPanel = new ChromatogramPanel(
        xAxisData,      // double[] with all the X axis data
        yAxisData,      // double[] with all the y axis data
        xAxisLabel,     // String with the label for the x-axis
        yAxisLabel);    // String with the label for the y-axis

    // add the chromatogram panel to the parent frame or dialog
    parentJPanel.add(chromatogramPanel );
    parentJPanel.validate();
    parentJPanel.repaint();
Reference Areas
Reference areas can be added to the ChromatogramPanel in the same way as for SpectrumPanels.
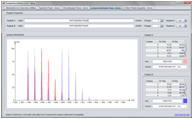
The Isotopic Distribution Calculation makes is simple to calculate and display the isotopic distribution of a peptide with different charges and labels.
To use the ChromatogramPanel in your project do the following:
    // create an isotopic distribution panel
    IsotopicDistributionPanel isotopicDistributionPanel =
        new IsotopicDistributionPanel(
            peptideSequence,       // peptide sequence
            charge,                // peptide charge
            true,                  // if true the peaks will be showned in a profile
                                   // like mode where support peaks are added in front
                                   // of and after the real peak
            nrNeutrons);           // the number of neutrons to add due to a label

    // calculate the isotopic distribution
    AASequenceImpl peptideSequence =
        isotopicDistributionPanel.getPeptideSequences().get(0);
    IsotopicDistribution lIso = peptideSequence.getIsotopicDistribution();

    // add the neutrons
    if (nrNeutrons> 0) {
        lIso.setLabelDifference(nrNeutrons);
    }

    // display the distribution in a table
    for (int i = 0; i < 15; i++) {
        if (Util.roundDouble(lIso.getPercTot()[i], 2) > 0) {
            ((DefaultTableModel) "your JTable".getModel()).addRow(
                new Object[]{
                    new Integer(i),
                    Math.floor(lIso.getPercTot()[i] * 10000.0) / 100.0,
                    Math.floor(lIso.getPercMax()[i] * 10000.0) / 100.0});
        }
    }

    // get mz of peptide
    peptideMz = Util.roundDouble(peptideSequence.getMz(charge + nrNeutrons, 4));

    // get molecular composition of peptide
    if (nrNeutrons > 0) {
        peptideComposition= peptideSequence.getMolecularFormula().toString() +
            " + " + labelDifferencePeptideA + "n");
    } else {
        peptideComposition = peptideSequence.getMolecularFormula().toString());
    }

    // add the isotopic distribution panel to the parent frame or dialog
    parentPanel.add(isotopicDistributionPanel);
    parentPanel.validate();
    parentPanel.repaint();
Reference Areas
Reference areas can be added to the IsotopicDistributionPanel in the same way as for SpectrumPanels.
The In Silico Protein Digestion can be used to in silico digest a protein sequence, wither from a FASTA or a continous sequence of amino acids.
To use the In Silico Protein Digestion in your project do the following:
    // the protein sequence
    String proteinSequence = "your protein sequence";

    // create the enzyme to use
    Enzyme selectedEnzyme = new Enzyme(
        aTitle,            // String with the title (or name) for this enzyme
        aCleavage,         // String with the rersidus after which cleavage will occur
        aRestrict,         // String with the residus which inhibit cleavage
        aPosition,         // String which should correspond to "Cterm" or "Nterm"
        aMiscleavages);    // int with the number of supported missed cleavages

    // perform the digestion and display the results
    Protein[] cleavedPeptides;

    if (proteinSequence.startsWith(">")) {

        // for FASTA sequences
        Protein protein = new Protein(proteinSequence);
        cleavedPeptides = selectedEnzyme.cleave(protein);
        cleanProteinSequence = protein.getSequence().getSequence();
    } else {

        // not FASTA format, assume sequence only, but remove white space and line shifts
        String cleanProteinSequence = proteinSequence;
        cleanProteinSequence = cleanProteinSequence.replaceAll("\\W", "");
        cleanProteinSequence = cleanProteinSequence.replaceAll("\n", "");
        cleavedPeptides = selectedEnzyme.cleave(
            new Protein(new String("no header"), cleanProteinSequence));
    }

    // cycle the peptides and add them to a peptide table
    for (int i = 0; i < cleavedPeptides.length; i++) {
        ((DefaultTableModel) peptidesJTable.getModel()).addRow(new Object[]{
            cleavedPeptides[i].getSequence().getSequence(),
            cleavedPeptides[i].getMass(),
            cleavedPeptides[i].getHeader().getStartLocation(),
            cleavedPeptides[i].getHeader().getEndLocation()});
        }
}The experiment package provides a standardized customizable objects for proteomics experiments. It consists of four main parts: biology, mass spectrometry, identification and quantification.
The handling of post-translational modifications is externalized allowing user specified modification processing:
	// load modifications from a modification file
	PTMFactory.getInstance().importModifications(modificationFile);

	// iterate the implemented modifications
        Iterator<PTM> ptmIt = ptmFactory.getPtmIterator();
Once the modifications loaded, one can easily load identifications from Mascot, OMSSA and X!Tandem into a standard structure:
	// load your identification file "yourFile" (Mascot DAT file, OMSSA OMX file or X!Tandem XML file)
        File identificationFile = new File(yourFile);

	// get the correspondig reader
	FileReader mascotReader = FileReaderFactory.getInstance().getFileReader(identificationFile);

	// load all identifications
	HashSet<SpectrumMatch> matches = mascotReader.getAllSpectrumMatches();
Theoretic fragment ions can be generated using the FragmentFactory and specta can be annotated afterward:
	// Load the fragment factory
	FragmentFactory fragmentFactory = FragmentFactory.getInstance();

	// estimate theoretic fragment ion masses of the desired peptide
	ArrayList<PeptideFragmentIon> fragments = fragmentFactory.getFragmentIons(peptide);

	// Create a spectrum annotator
	SpectrumAnnotator spectrumAnnotator = new SpectrumAnnotator();

	// Annotate the spectrum with the desired m/z tolerance (mzTolerance)
        // and with the desired minimal peak intensity (intensityMin)
	spectrumAnnotator.annotateSpectrum(peptide, spectrum, mzTolerance, intensityMin);
It is also possible to attach the spectra to the current ProteomicAnalysis. Currently mgf and mzML files are supported. mzML files are handled by jmzml. It is possible to load all spectra or only identified spectra:
	// Load all spectra in the spectrum collection of the proteomicAnalysis
	proteomicAnalysis.getSpectrumCollection().addSpectra(spectrumFile);

	// Load all spectra identified by the given MS2Identification
	proteomicAnalysis.getSpectrumCollection().addIdentifiedSpectra(spectrumFile, ms2Identification);
The corresponding XML files are exampleFiles/experiment package and are also generated by SearchGUI after each search.
Enzymes used for OMSSA and X!Tandem are located in an external XML file and can be accessed:
	// load the enzymes
	EnzymeFactory.getInstance().importEnzymes(enzymeFile);

	// retrieve the enzymes
	EnzymeFactory.getInstance().getEnzymes();
FASTA files can be loaded into the structure. The proteins are loaded into the SequenceDataBase class:
	// Create a new SequenceDataBase
	SequenceDataBase db = new SequenceDataBase("SGD", "test");

	// Create a FastaHeaderParser which will be used to parse the fasta header
        // (here the accession is given surrounded by '|')
	FastaHeaderParser fastaHeaderParser = new FastaHeaderParser("|", "|");

	// Import your fasta file
	db.importDataBase(fastaHeaderParser, fastaFile);
All experiment objects can be completed by user-defined parameters. They all extend the ExperimentObject class:
	// Add a user defined parameter
	yourObject.addUrParam(
		aParameter,            // UrParameter, your parameter key
		aValue);               // Object, the desired value

	// Get a user parameter back
	yourObject.getUrParam(
            theParameter);	       // UrParameter, the key of the stored parameter
It is possible to save/open compomics experiments. This is achieved by the serialization of the instance of the Experiment object and all its attributes. The class ExperimentIO makes this operation straightforward, note however that spectrum peak lists will be emptied before saving:
    // experimentIO will take care of the saving/opening of files
    ExperimentIO experimentIO = new ExperimentIO();

    // Saves the experiment "experiment" in the selected file "selected file"
    experimentIO.save(selectedFile, experiment);

    // Returns the date of saving of the experiment stored in myFile
    experimentIO.getDate(myFile);

    // Returns the experiment saved in myFile
experimentIO.loadExperiment(myFile); Proteomics data is often stored in relational databases and to use the data the developer has to interact with the database. To simplify this process compomics-utilities contains automatic generation of data access code to extract the wanted data.
Usage:
java -cp utilities-X.Y.Z.jar com.compomics.util.db.DBAccessorGenerator [--user <username> --password <password>] <DBDriver> <DBURL> <tablename> <outputpackage>Example:
java -cp
utilities-X.Y.Z.jar com.compomics.util.db.DBAccessorGenerator
--user TestUser --password BadPassword com.mysql.jdbc.Driver
    jdbc:mysql://server.com/myDb testTable com.compomics.test.db
The above command line will create a class called TestTableAccessor in the com.compomics.test.db package that can be used to access the data in the tabled named ´testTable´, using the provided user name and password to access the database.
It is often necessary to map amino acid sequences to a protein database. This can be achieved using our PeptideMapper application. The code below shows how to use this application as a dependency. Example code can be found in the PeptideMapper command line interface class.
    // Parse the FASTA file
    SequenceFactory sequenceFactory = SequenceFactory.getInstance();
    sequenceFactory.loadFastaFile(fastaFile);

    // Index the protein sequences
    FMIndex peptideMapper = new FMIndex(waitingHandler, true, ptmSettings, peptideVariantsPreferences)

    // Map a peptide sequence to the protein sequences
    ArrayList<PeptideProteinMapping> proteinMapping = peptideMapper.getProteinMapping(sequence, sequenceMatchingPreferences);

    // Map a sequence tag to the protein sequences
    ArrayList<PeptideProteinMapping> proteinMapping = peptideMapper.getProteinMapping(tag, null, sequenceMatchingPreferences, tolerance);
The above code uses the following objects:
| Object | Class | Description |
|---|---|---|
| fastaFile | File | File containing the protein sequences in the FASTA format. |
| waitingHandler | WaitingHandler | A waiting handler, see some implementations here. Ignored if null. |
| ptmSettings | PtmSettings | The PTM settings to use. |
| peptideVariantsPreferences | PeptideVariantsPreferences | Peptide variants to consider. For no variants use PeptideVariantsPreferences.getNoVariantPreferences(). |
| sequence | String | A peptide sequence as String. |
| sequenceMatchingPreferences | SequenceMatchingPreferences | The sequence matching preferences. For identical string matching use SequenceMatchingPreferences.getStringMatching(), for amino acid matching use SequenceMatchingPreferences.getDefaultSequenceMatching(). |
| tag | Tag | An amino acid sequence tag. |
| tolerance | double | The mass tolerance to use for the mass gaps mapping. |


