-
Notifications
You must be signed in to change notification settings - Fork 0
Tutorial 3: Actions
Note: This tutorial assumes that you are familiar with the concept of Actions and UMRFs in TeMoto.
Note: All examples shown in this tutorial can be found and replicated via Temoto Tutorials repository.
First, let's play around with some predefined UMRF graphs in the temoto_tutorials to see how actions can be used to load and control a robot or multiple robots. Then, a detailed guide is provided on how TeMoto actions and UMRF graphs can be created.
This example utilizes a simulation of robotont, which is a holonomic mobile base.
Launch TeMoto and bring up robotont:
# Bring up TeMoto in the first terminal
roslaunch tutorials_temoto_config temoto.launch temoto_namespace:=robotont

# Navigate to the UMRF graphs folder in the second termial and run the graph
cd <your-catkin-ws-dir>/src/temoto_tutorials/tutorials_temoto_config/umrf_graphs

rosrun temoto_action_engine umrf_graph_publisher robotont_sim_1_initialize.umrfg.json robotont
You should now see RViz and a robot that's standing still. The robotont_sim_1_initialize UMRF graph contained two actions, where the first one, ta_initialize_robot, loaded the robot via Robot Manager, and the second action, ta_visualize_robot, visualized the robot via Visualization Manager.
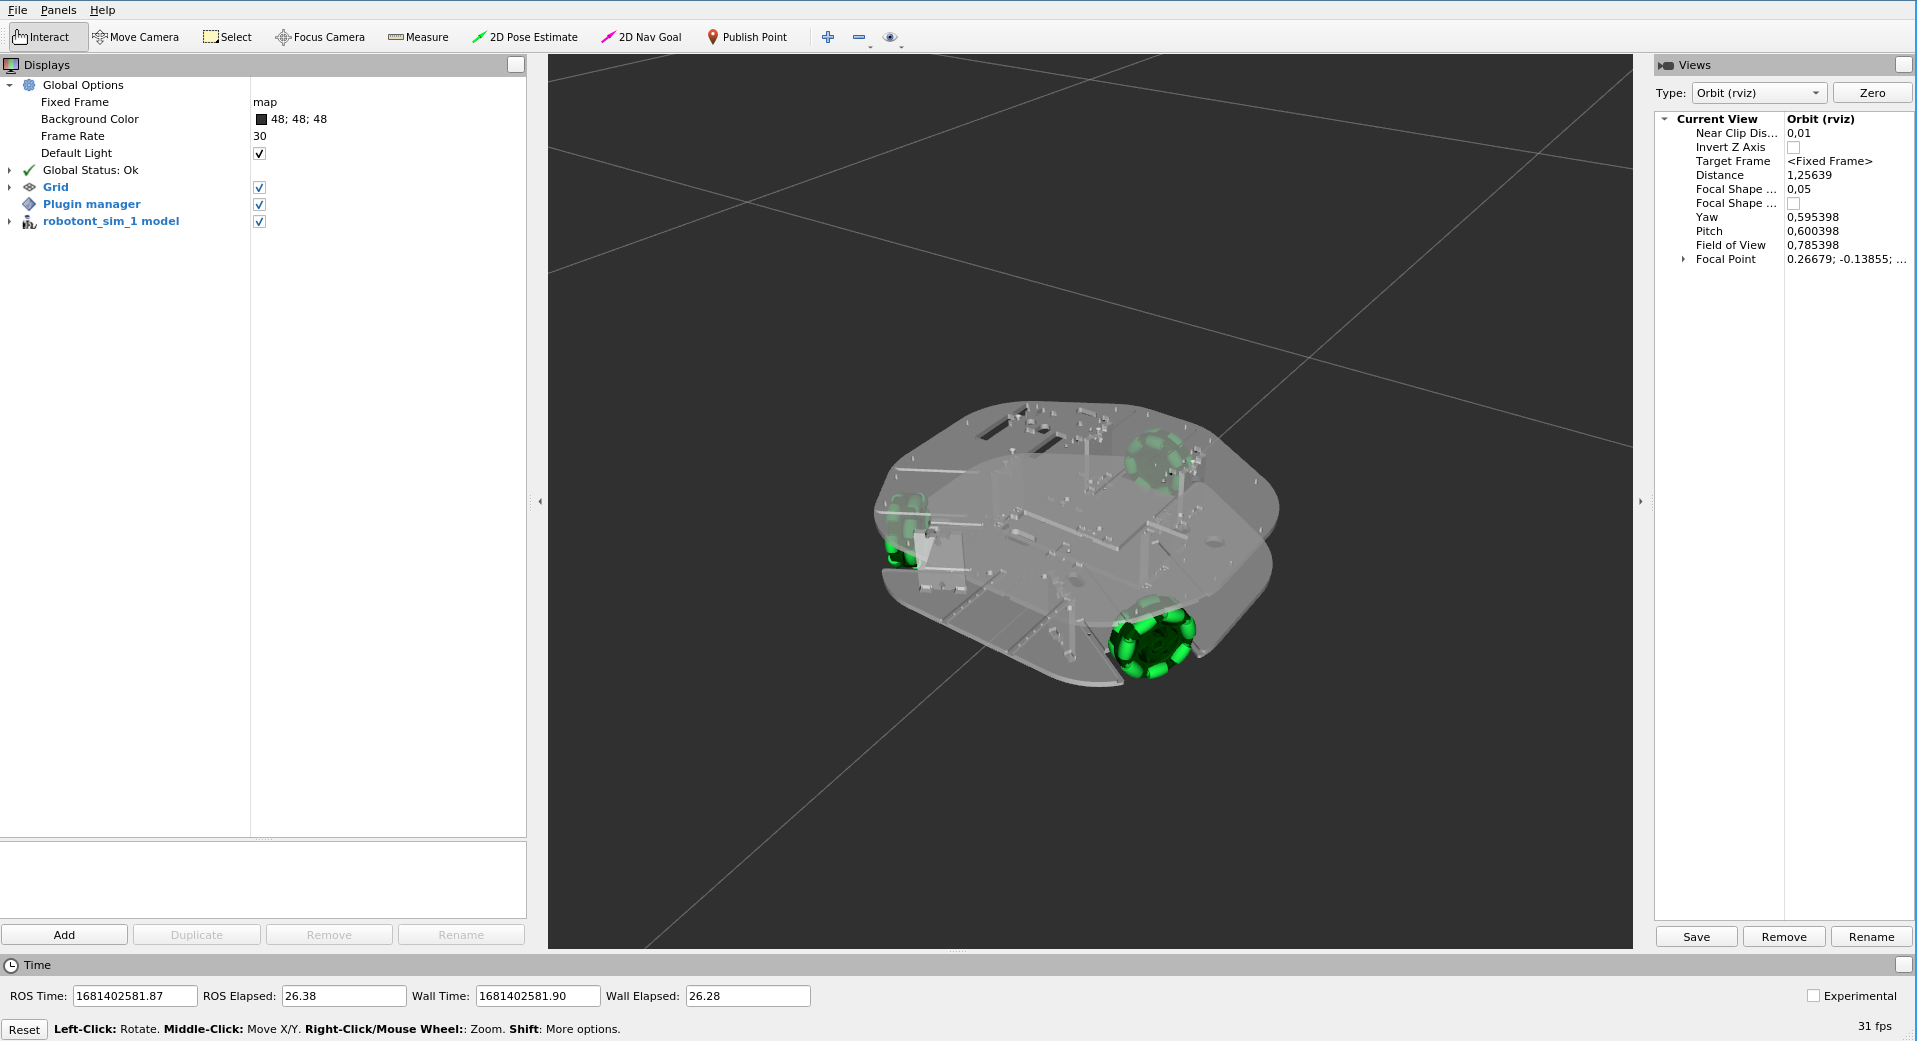
Now lets make the robot continuously navigate between three waypoints:
# In the same terminal where you invoked the previous UMRF graph
rosrun temoto_action_engine umrf_graph_publisher robotont_sim_1_nav_cycle.umrfg.json robotont
The robotont_sim_1_nav_cycle UMRF graph contained three instances of ta_navigate_robot action, configured into a cycle. Once you had enough fun watching a robot go endlessly in circles, you can stop the graph by publishing a ROS message to the /broadcast_stop_umrf_graph topic:
rostopic pub -1 /broadcast_stop_umrf_graph temoto_action_engine/BroadcastStopUmrfGraph "umrf_graph_name: 'robotont_sim_1_nav_cycle'
targets:
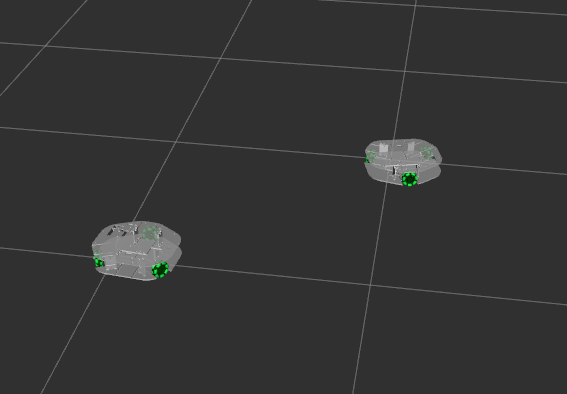
- 'robotont'"This example demonstrates the Action Engine's capability to run UMRF graphs concurrently. If you're going through this section directly from the previous one ("Single robot example") then you can just load in a new robot by running:
rosrun temoto_action_engine umrf_graph_publisher robotont_sim_2_initialize.umrfg.json robotontAnd now you can make both robot perform the cyclical navigation task via:
rosrun temoto_action_engine umrf_graph_publisher robotont_sim_1_nav_cycle.umrfg.json robotont
rosrun temoto_action_engine umrf_graph_publisher robotont_sim_2_nav_cycle.umrfg.json robotont
The basis for an action can be easily generated via TeMoto Action Assistant. Since the structure of an action is defined by its UMRF, the TeMoto Action Assistant provides the graphical interface for creating an UMRF. Once you are happy with the UMRF, a basis for action implementation package is generated, including a c++ source file. Each action is implemented as a ROS package.
# use the <custom_temoto_config> package you created in Tutorial 2
roslaunch <custom_temoto_config> action_assistant.launch
This should bring up the start screen of the action assistant, depicted in Fig. 1.
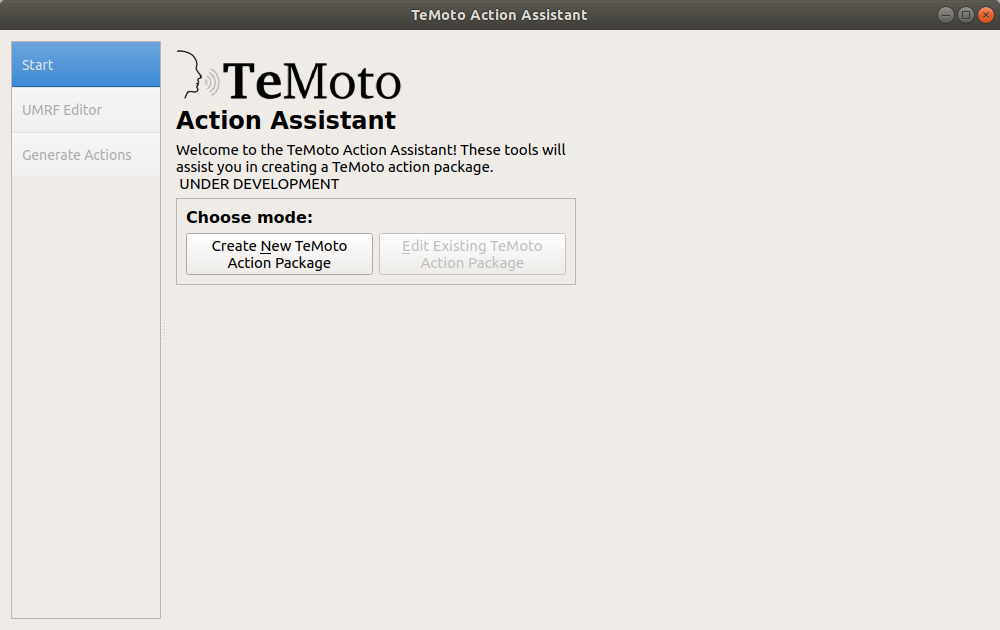
Figure 1: Start screen of the TeMoto Action Assistant
Click on "Create New TeMoto Action Package".
Go to the "UMRF Editor" tab (depicted in Fig. 2). This tab consists of 2 main sections:
- UMRF Viewer section, which visually shows the structure of the UMRF.
- Item Editor section, which allows to edit the currently active item in the UMRF Viewer.
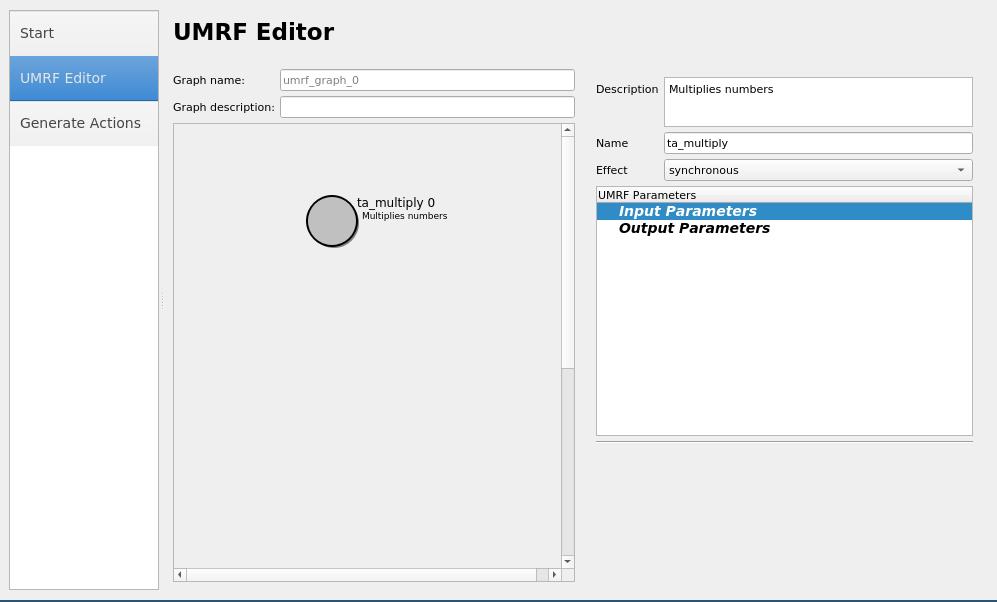
Figure 2: UMRF Editor tab
Each action is represented with an interactive circle in the canvas, that you can move and edit in the Item Editor section.
- Modify the name by clicking on the "Name:" item in the UMRF viewer and changing the name in the item editor. In the given example, let's call it "multiply"
- Add new input parameter by right-clicking on the "Input Parameters" item and selecting "ADD parameter".
![]()
Figure 3: UMRF Editor Adding parameters
There is a dropdown menu with a list of pre-defined parameters that you can use, or it is also possible to create your own parameter structure in the custom tab. For now, select "my_number (number)" and click "ok".
- Select the newly created parameter and change its name to
dataand make sure the type isnumber. - Add another input parameter and change its name to
multiplierand its type tonumber. - Add an output parameter and change its name to
dataand its type tonumber.
The UMRF is now complete (end result shown in Fig. 4).
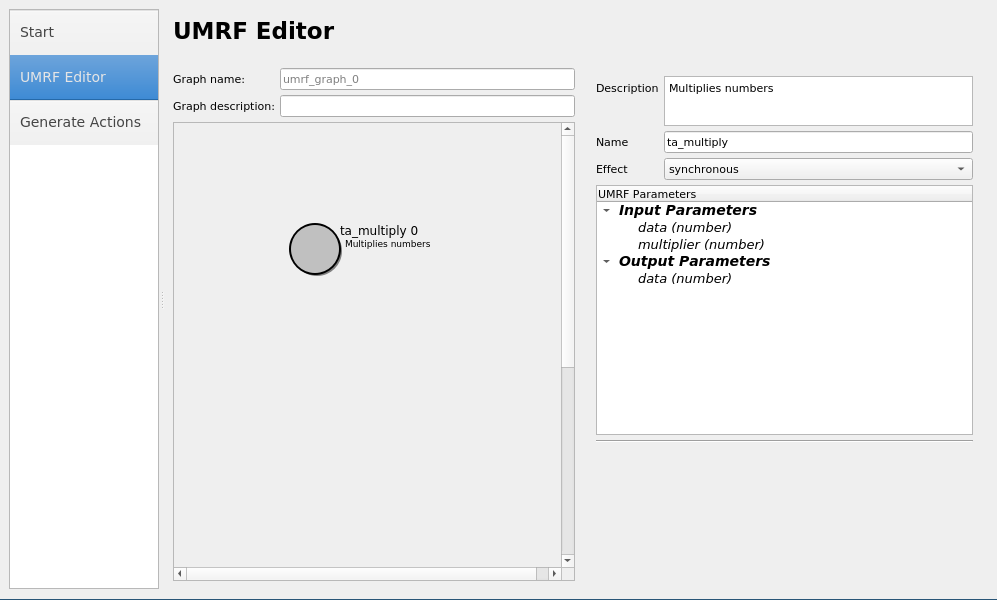
Figure 4: UMRF of
multiplyaction with input and output parameters
Go to the "Generate Actions" tab (depicted in Fig. 5).
- Since this tutorial assumes that the Action Assistant was opened via TeMoto workspace (see the first step in this tutorial), then the directory where the action will be generated is automatically set. If that's not the case then select the directory where the action package is generated.
- Generate the package by clicking the "Generate" button.
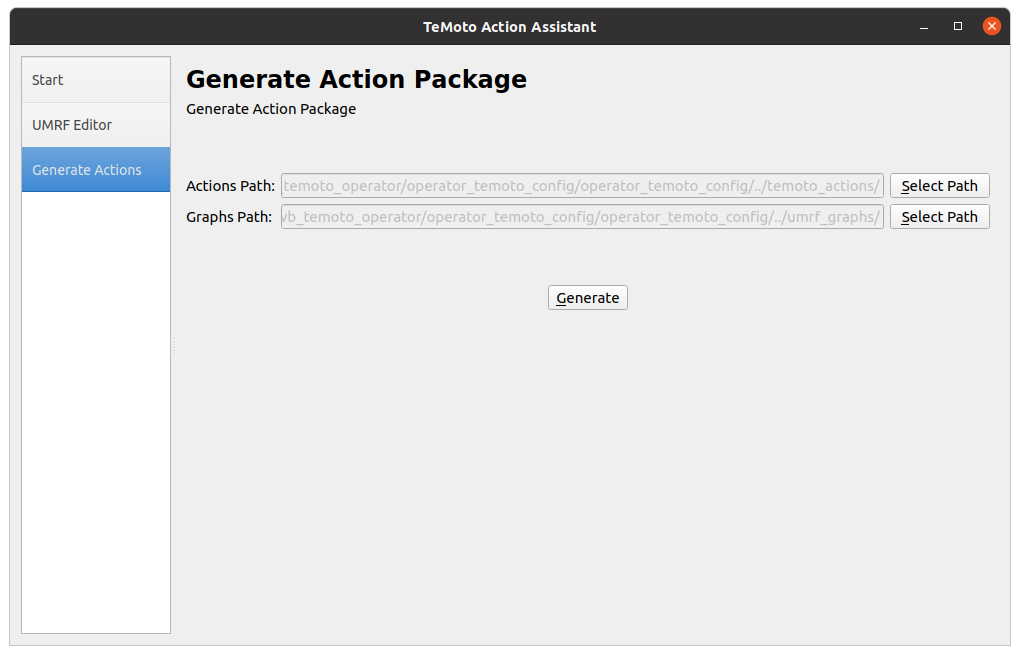
Figure 5: Generate Action tab
Note: Leave the action assistant open, since it is used later in the UMRF Graph section
Now navigate to the generated package and open the action source file with your preferred editor. For example:
    cd <custom_temoto_config>/temoto_actions/ta_multiply/src
    gedit ta_multiply.cpp
The action source file contains a bunch of things that are necessary for TeMoto, but we are going to focus on a executeTemotoAction() function. This function is invoked when the action is executed.
Locate the block comment which says "YOUR CODE HERE":
    void executeTemotoAction()
    {
      getInputParameters();

      /* * * * * * * * * * * * * * * * * * * * * * *
      *
      *         ===> YOUR CODE HERE <===
      *
      * * * * * * * * * * * * * * * * * * * * * * */

      setOutputParameters();
    }
and replace it with code that multiplies the numbers and puts the result to the output parameter out_param_data
    void executeTemotoAction()
    {
      getInputParameters();

      out_param_data = in_param_data * in_param_multiplier;
      TEMOTO_INFO("%f * %f = %f", in_param_data, in_param_multiplier, out_param_data);

      setOutputParameters();
    }
Do not modify any of the autogenerated code. Otherwise your action will likely not work properly.
catkin build
# (source your workspace)

# In the first terminal, launch TeMoto
roslaunch <custom_temoto_config> temoto.launch temoto_namespace:=<namespace>

# In the second terminal, invoke the UMRF Graph
roslaunch ta_multiply invoke_action.launch temoto_namespace:=<namespace>
The first terminal, where you launched TeMoto, should show:
[custom_temoto_config/action_engine/TaMultiply_0::executeTemotoAction] 0.0 * 0.0 = 0.0
You can change the input values (denoted as pvf_value) by modifying the test/ta_multiply.umrfg.json under your action package root folder like so:
   {
       "name": "TaMultiply",
        "package_name": "ta_multiply",
        "id": 0,
        "state": 0,
        "effect": "synchronous",
        "input_parameters": {
            "data": {
                "pvf_type": "number",
                "pvf_value": 3.0
            },
            "multiplier": {
                "pvf_type": "number",
                "pvf_value": 11.0
            }
        },
        "output_parameters": {
            "data": {
                "pvf_type": "number"
            }
        }
   }
Save the file and run invoke_action.launch again (no need to recompile the code). The terminal output should now be:
[custom_temoto_config/action_engine/TaMultiply_0::executeTemotoAction] 3.0 * 11.0 = 33.0
You can also use the Action Assistant to create UMRF graphs. You can create as many actions as needed, and connect them in different configurations (sequential, concurrent, cycles).
You can create a new action on the canvas or reuse an existing action by doing a right click and either selecting ADD Action or ADD Existing Action
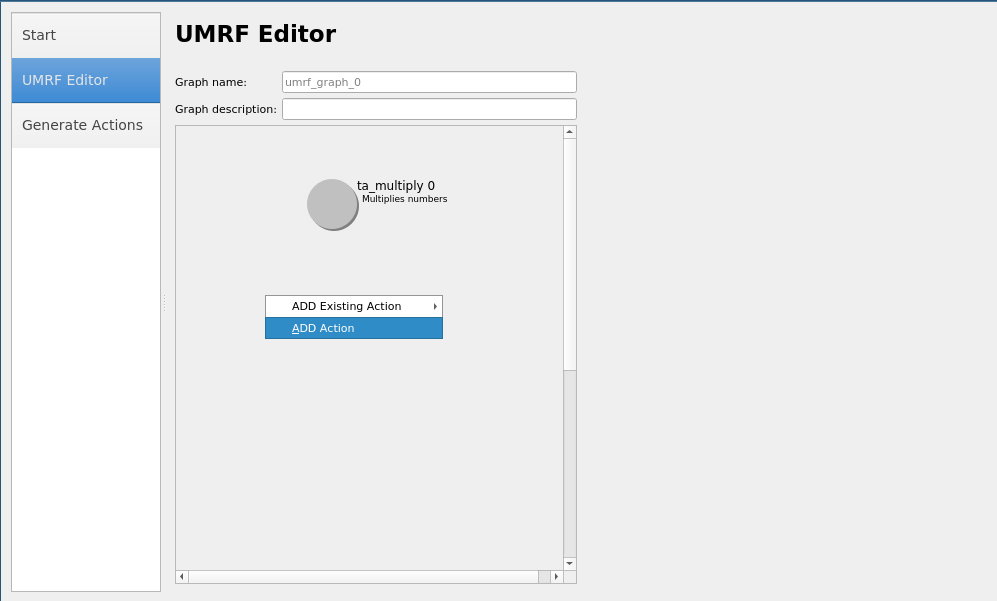
Figure 6: Add action to UMRF Graph
For this example, let's create a new TeMoto action "pow" that raises a number to the power of specified value (e.g., 2^3=8).
- Add a new action and name it
pow - Add an input parameter and change its name to
dataand make sure the type isnumber. - Add another input parameter and change its name to
exponentand its type tonumber. - Add an output parameter and change its name to
dataand its type tonumber. - Change the Graph name to
pow_and_multiply - In order to connect the actions, select the parent node, then right click over the child node, and click connect. An arrow from the parent node pointing to the child should appear now.
Note that in order to pass values between actions, the name of the input parameter on the child action must match the name of the output parameter of tha parent action.
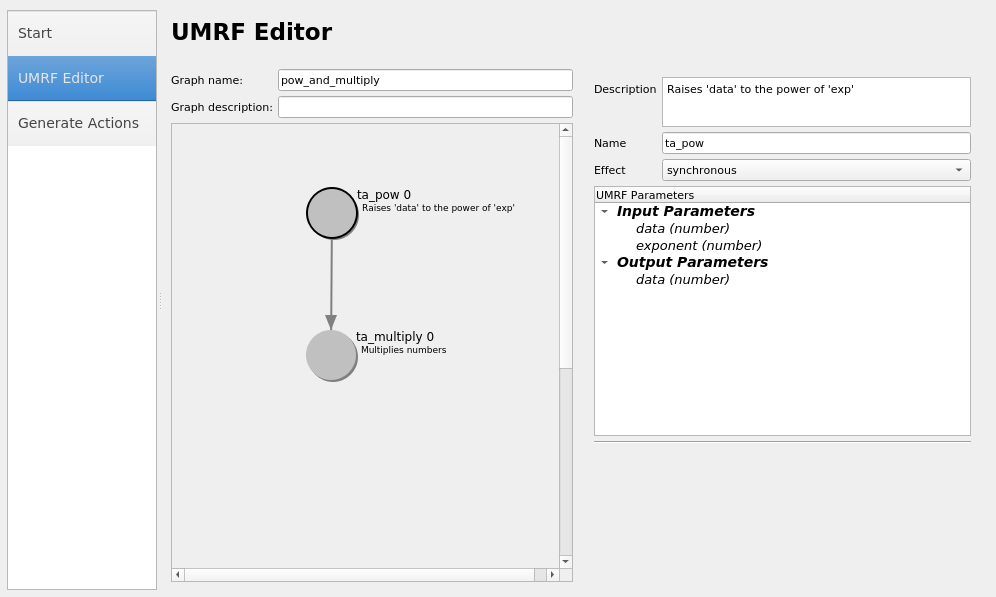
Figure 7: UMRF Graph with pow and multiplication actions in sequence
- Click on the "Generate Actions" tab and "Generate" button to create the new Temoto action and the UMRF graph.
Replace the block "YOUR CODE HERE" in ta_pow.cpp with code that raises in_param_data to the power of in_param_exponent and puts the result on the out_param_data parameter:
// Make sure to include the cmath header!
#include <cmath>

...

void executeTemotoAction()
{
  getInputParameters();

  out_param_data = std::pow(in_param_data, in_param_exponent);
  TEMOTO_INFO("std::pow(%f, %f) = %f", in_param_data, in_param_exponent, out_param_data);

  setOutputParameters();
}catkin build
# (source your workspace)- Open the
"<custom_temoto_config>/umrf_graphs/pow_and_multiply.umrfg.json"file - Locate the
dataandexponentparameters ofTaPowaction, and add "pvf_value":
    "name": "TaPow",
    "input_parameters": {
        "data": {
            "pvf_type": "number",
            "pvf_value": 2
        },
        "exponent": {
            "pvf_type": "number",
            "pvf_value": 3
        }
}- Do the same for
multiplierparameter ofTaMultiplyrespectivelly (keep thedataunchanged, we want theTaPowto return data toTaMultiplyduring runtime).
    "name": "TaMultiply",
    "input_parameters": {
        "data": {
            "pvf_type": "number"
        },
        "multiplier": {
            "pvf_type": "number",
            "pvf_value": 2
        }
}- Invoke the graph:
# In the first terminal, launch TeMoto
roslaunch <custom_temoto_config> temoto.launch temoto_namespace:=<namespace>

# In the second terminal, invoke the UMRF Graph
rosrun temoto_action_engine umrf_graph_publisher <path_to_pow_and_multiply.umrfg.json> <temoto_namespace>
Now you should see :
[custom_temoto_config/action_engine/TaPow_0::executeTemotoAction] std::pow(2.000000, 3.000000) = 8.000000

[custom_temoto_config/action_engine/TaMultiply_0::executeTemotoAction] 8.000000 * 2.000000 = 16.000000