-
Notifications
You must be signed in to change notification settings - Fork 1
11 Remote
-
Visual Studio Code Remote Development enables you to leverage a container, remote machine, or the Windows Subsystem for Linux (WSL) as a comprehensive development environment. For detailed documentation, visit the official guide.
In our workshop, you will connect your laptop to the EC2 instance over an SSH connection. The SSH server is already configured on the EC2 instance, you can start it from the Windows Services. Click on the start button of the "OpenSSH SSH Server":

-
Install Visual Studio Code on your machine and add the "Remote - SSH" extension from Microsoft:

-
SSH connections are typically established using a private/public key pair. Save your private key to a text file on your machine:
-----BEGIN OPENSSH PRIVATE KEY-----
b3BlbnNzaC1rZXktdjEAAAAABG5vbmUAAAAEbm9uZQAAAAAAAAABAAAAMwAAAAtzc2gtZW
QyNTUxOQAAACDQZTGNB/lO5YWgrMWcXqb3DyaLi4c0zHgZ2FxSlE1SYAAAAKCDhZzOg4Wc
zgAAAAtzc2gtZWQyNTUxOQAAACDQZTGNB/lO5YWgrMWcXqb3DyaLi4c0zHgZ2FxSlE1SYA
AAAEAn2ey3ReyxZGOx8V6caYGXZgGSZWBeGpn2sFAgMZ9jm9BlMY0H+U7lhaCsxZxepvcP
JouLhzTMeBnYXFKUTVJgAAAAHWFkbWluaXN0cmF0b3JARUMyQU1BWi1DVkdJTEJJ
-----END OPENSSH PRIVATE KEY-----
You can use any file name for this private key.
-
In VS Code, execute the command "Open SSH Configuration File..." from the Command Palette (
Ctrl + Shift + P). This will allow you to edit your SSH configuration file directly within the editor.
-
Select the SSH configuration file located in your user directory. The exact path will vary based on your username and operating system. Typically, it is found at
~/.ssh/configon Unix-based systems orC:\Users\<YourUsername>\.ssh\configon Windows.
If the file already exists, append the new lines at the end of the file:

-
Add those lines at the end of the file. You'll have to modify the HostName and IdentityFile values to match your environment.
Host EC2 HostName ec2-52-50-108-156.eu-west-1.compute.amazonaws.com User administrator IdentityFile C:\Users\gquerret\Desktop\ec2.txt -
Once you have saved the configuration, execute the command "Connect to Host" from the Command Palette (
Ctrl + Shift + P). This will establish the SSH connection using the settings you just configured.
Select "EC2" entry.

-
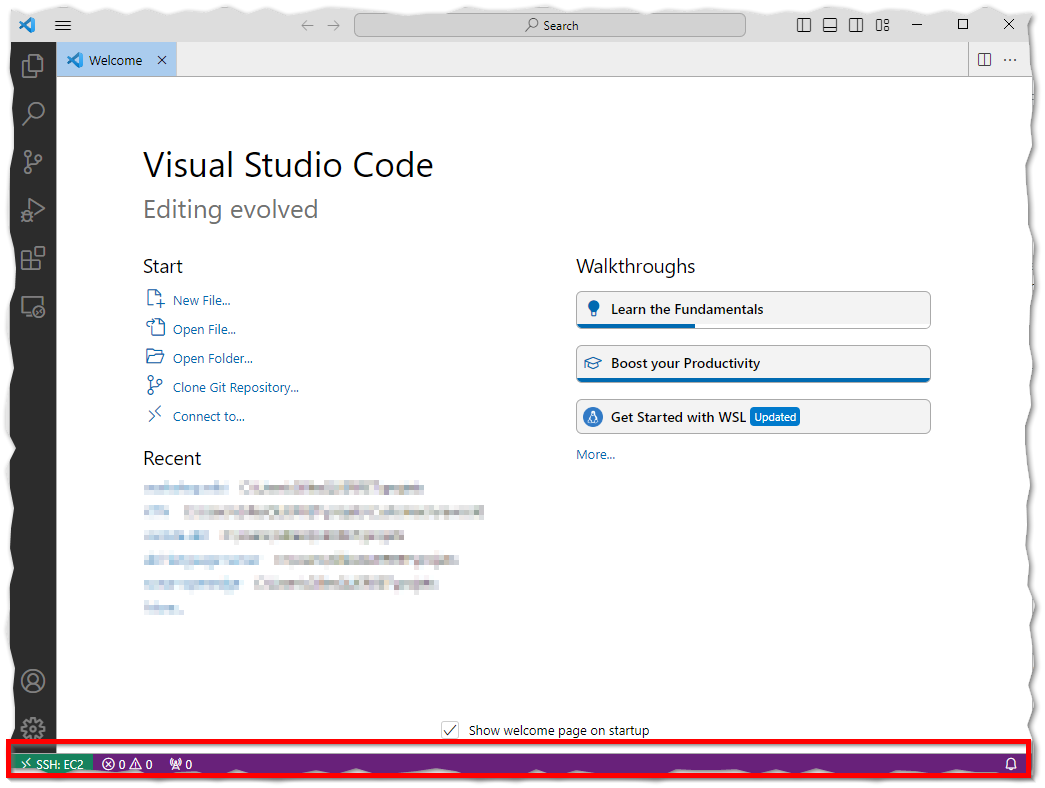
This action will open a new window with a purple status bar, indicating that you are in Remote Development mode in VS Code. Additionally, the bottom left corner will display "SSH: EC2", confirming that you are connected to the EC2 instance via SSH.

-
Click on the "Open Folder" link, and navigate to
C:\workshop\Chapter3. Select this folder to open it in the remote environment.
-
Select "Trust authors" to confirm that the directory is safe. Once trusted, open
src/test1.pto begin working with the file.
-
You'll see that the files are exactly where you saved them in the previous chapters. However, you might notice that there's no syntax highlighting, and nothing happens when you save the file. This is because extensions are managed separately by the local VS Code and the remote VS Code environment.
To resolve this, open the Extensions tab, search for "OpenEdge ABL" (by Riverside Software), and click on the "Install in SSH: EC2" button. This will install the extension in the remote environment, enabling syntax highlighting and other features.

-
After installing the plugin, you might encounter an issue where the language server fails to start:

-
Configuration is also handled differently in Remote Development. Execute the command "Preferences: Open Remote Settings (JSON)" from the Command Palette (
Ctrl + Shift + P) to configure the location of OpenEdge installations.
The content of the file should be:
{ "abl.configuration.runtimes": [ { "name": "12.8", "path": "C:\\Progress\\OpenEdge-12.8" } ] } -
Restart the language server.