-
Notifications
You must be signed in to change notification settings - Fork 2
creators using the blender gltf exporter
Note: 以下のドキュメントは、Blenderの最新の安定版リリースを使用していることを前提としています。古いバージョンや実験的な Blender のビルドを使用しても動作するかもしれませんが、保証するものではありません。
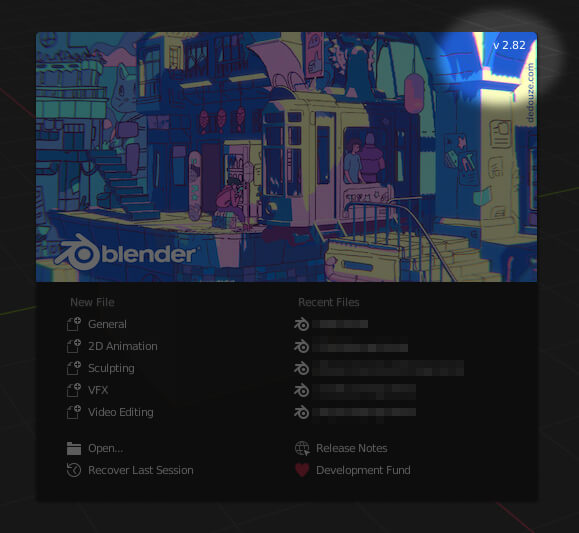
Blenderの最新の安定版を使用している事を確認するには、Blenderの起動時に出るスプラッシュ画面の右上を確認して、Blenderのメインダウンロードページにあるものと一致することを確認してください。https://www.blender.org/download/
Blenderで作成されたものすべてをgLTF(glb)形式にエクスポートするできるわけではありません。 これは、Blender glTFのインポート/エクスポーターアドオンの継続的改善と、glTFファイル形式自体の変更が発生する場合があるからです。 一般的には、テクスチャや頂点カラーの有無にかかわらずにモデルをエクスポートできます。 骨格アーマチュアを持つモデル、シェイプキー(モーフィング)を持つモデル、及び、アニメーションを持つモデルも同様にエクスポートができます。 (何らかの変更が発生されない限り)正常にエキスポートが できないものの例として、Blenderのパーティクルシステム、(流体シミュレーションや布シミュレーション等の)キャッシュされた頂点アニメーション、特定の種類のシェーダー等があげられます。
もし、疑問やBlenderファイルのエクスポートの際に問題が発生する場合は、以下を参照してください。 glTF file format overview
Blender glTF Importer/Exporter Github repository
Blenderで見たものがSpokeやHubsで得られるものと同じであることを確認するために、いくつかチェックすべきことがあります。これは網羅的なリストではありませんが、予想外の結果を引き起こす可能性のある一般的なものがいくつか含まれています。
+ スケールは 1, 1, 1 で読み取られる必要があります
It's easy to scale things in Blender and then forget to apply that scale (CTRL+a). If your object's scale reads something other than 1, 1, 1 then you can end up with an exported model that doesn't match the size or proportion you expected. One way to avoid this common pitfall is to do all your scaling while in Edit mode. Scaling in Edit mode doesn't alter the object scale values.
Blenderでスケールを設定した後に、そのスケールを適用するのを忘れてしまうことはよくあります (CTRL+a).。もしオブジェクトのスケールが 1, 1, 1 以外で設定されている場合、エクスポートされたモデルは期待したサイズやプロポーションと一致しないことになります。このよくある落とし穴を避ける方法のひとつは、編集モードですべてのスケーリングを行うことです。編集モードでのスケーリングは、オブジェクトのスケール値を変更しません。
+ オブジェクトはワールドの原点 (0, 0, 0) か近くにある必要があります
SketchfabやGoogle Polyのようなサードパーティのサイトからのモデルがワールドの原点の近くに存在しないのは非常によくある事です、特にアニメーションが設定されている場合は。 モデルがHubsにドロップされた際に、ローディングキューブが存在していた場所から離れた場所にいた場合に、この問題に気づくことができます。
+ 表示したいモディファイアを適用する
Blender modifiers need to be applied in order for them to show up on your exported model. For example, a character that was made by modeling one half, then adding a 'Mirror' modifier to duplicate the other side will only export the modeled half unless you first Apply that 'Mirror' modifier. If you do not wish to commit to applying that modifier because you are still iterating on your design, you may want to simply duplicate the model first, apply the Mirror, then export just that duplicate. Note: There is a setting in the glTF exporter to 'Apply Modifiers' upon export. However, this applies all modifiers including Armature modifiers (for skinning to a skeleton) which may not be desirable.
Blenderモディファイアがエキスポートされてモデルに表示させる場合は適用する必要があります。 例えば、半分だけモデリングされたキャラクターがいて、ミラー・モディファイアを追加し、もう片方を複製した直後にエクスポートした場合は、半分のモデルのまま表示される事になります。複製された片方も表示させる場合には追加された ミラー モディファイアを 適用 させる必要があります。 デザイン中の状況であるため、あなたがモディファイアを適用させたくない場合、まずモデルを先に複製した後に、ミラーを適用させ、複製したほうをエクスポートした方が良いかもしれません。 注: gITF Exporterにはエクスポートの際に「Apply Modifiers」設定があります。 しかし、これはアーマチュア・モディファイア (スケルトンのスキニング) を含んだ上で適用するので、望まない結果になる可能性があります。
+ アニメーショントラックを持つオブジェクトには、それらのトラックを「'Stashed'」に設定する必要があります
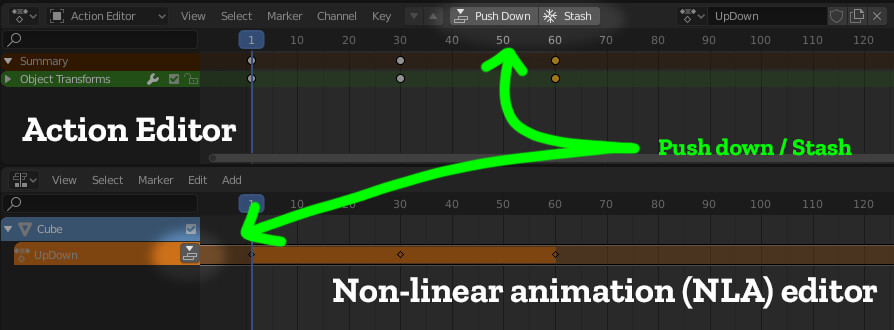
複数のアニメーションを持つオブジェクトをサポートするため、全てのアニメーショントラックは最初に「Stashed」または「Push Down」にする必要があります。 これはアクションエディタまたはNLA (ノンリニアアニメーション) エディタから実行できます。
+ glTF と glb は似て非なるものです。
要約:エクスポートする時、.glb形式でエクスポートされていることを確認しましょう Spoke と Hubは .glb ファイルを使うことが想定されています。 単一の .glb ファイルには、すべてのメッシュデータ、画像テクスチャ、および関連情報が1つのバイナリファイルに格納されています。 Glbファイルは、.bin やテクスチャファイルをそれぞれに移動する必要がないため、扱いやすいとされています。 上級者にとって、テキストエディタを使用して直接ファイルを編集するために、gITFとしてエクスポートする事も可能です。 glTF を glb に変換するために利用可能な複数のコンバータもあり、その逆も同様です。 詳細については、glTF file format overview を参照してください。
+ エクスポーターの設定を理解する
There are quite a few settings to understand in the glTF exporter, but fortunately, they are divided into sections to make it a little easier. In many cases, the defaults work just fine. However, there are a few worth noting when troubleshooting:
- (Include) 'Selected Objects' - Checking this allows you to only export the selected items you want. It's easy to forget this is turned on--(and even easier to forget to select things first!)
- (Include) 'Custom Properties' - This one is necessary if you're using things like the custom Hubs comoponents add-on (more on this later) but in most cases is not necessary.
- (Geometry) 'Apply Modifiers' - See info above. In most cases you'll want to leave this OFF.
- (Geometry) 'UVs, Normals, Tangents' - Best left ON. There may be unusual cases where you don't want these but it would be rare.
- (Geometry) 'Vertex Colors' - If you choose to paint vertex colors on your model, which can be a cheap, fast way of applying basic color instead of a texture, you'll need this ON. Otherwise, you can turn it OFF with no apparent effect.
- (Geometry) 'Materials' - Pretty much all models require materials to display properly so you will need this ON.
- (Geometry) 'Compression' - This might seem like a good idea, but as of this writing, Hubs does not support objects with Google Draco mesh compression. Leave this OFF.
- (Animation) 'Limit to Playback Range' - Make sure your playback range is set properly to see the full animation get exported.
- (Animation) 'Always Sample Animations' - This one has been found to significantly increase the file size in some cases. Try turning this OFF. If your animation(s) still work without it, leave it OFF.
- (Animation) 'NLA Strips' - You must have this ON if you've stashed a bunch of animation tracks on your object(s).
- Shape Keys - You must have this turned ON if you have an object that requires shape keys (also known as morph targets or blend shapes in other software).
- (Shape Keys) 'Shape Key Normals' - This one can be turned OFF as long as your morphs don't do anything special with the object's normals. If you see odd shading occur when the morphs happen, try toggling this.
- Skinning - You must have this turned ON if your object is bound to a skeletal armature.
Blender's documentation has all of the latest information about how materials should be configured for glTF. This information can be found easily by searching for 'glTF' in their docs. Here's the link to Blender's glTF documentation
Instead of repeating that information, here are some helpful tips:
+ Whenever possible, use 'unlit' materials
While 'unlit' is a somewhat confusing name, it refers to materials where the lights within the scene have no effect on the object(s). In other words, they appear fully lit on their own. Unlit materials are the 'cheapest' materials to render and look the same on all devices. For this reason, many times people will 'bake' the lighting and shadow information into the baseColor texture first, then apply it to an unlit material. The Blender manual mentions how to make an unlit shader graph, but it's not particularly obvious.
Part of why this is difficult is because you must use the 'Background' node in your shader graph--but the 'Background' node is not listed with all the other nodes by default. Instead, you must find that node by switching the Shader editor to 'World' mode, then copy/paste it into your object's shader graph. You can add it to your Quick Favorites menu to make it easy to find later:
Once you have the Background node, you can plug your texture into it, and send that to the Material Output. When you export to glb and bring the object into Spoke or Hubs, it will be 'unlit' (or fully lit, depending how you think of it.)
An Unlit material is the best type to use for a 'sky dome' since it will not be affected by any scene lights. Generally speaking, if your object doesn't require specular highlights or surfaces that change their look based on lighting, use an unlit material.

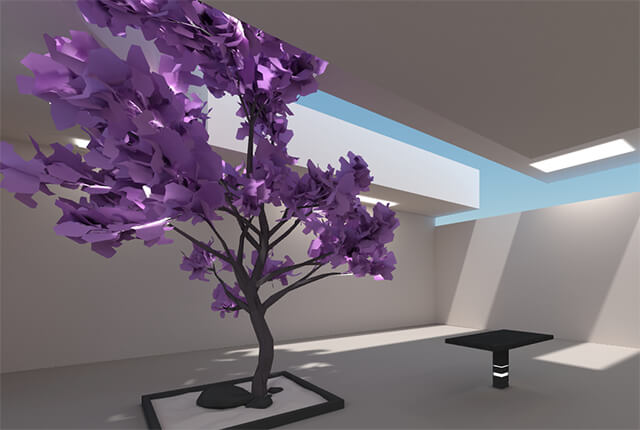
The scene above had all its lighting baked in Blender, then exported with unlit materials. Putting lights in this scene would have no effect on the room itself, but it looks great (and the same) on all devices.
このサイトの主なドキュメントは Mozilla Reality による ドキュメント Hubs Docs の派生日本語翻訳であり、CCPL によってライセンスされています。 Reticulum, Dialog などの派生プロジェクトのドキュメントは参考訳であり、それぞれのリポジトリのライセンスに基づきます。
Most documents in this site are based on a derivative Japanese translation of Hubs Docs by Mozilla Reality, used under CCPL. Some reference translation for derived projects such as Reticulum and Dialog, etc. are based on each license of repositories.
- 導入
- はじめよう
- よくある質問
- コンテンツのインポート
- おすすめのアセットパック
- 見た目と印象のカスタマイズ
- コンテンツの管理
- 管理者の追加
- レシピ:ルームの権限
- レシピ:サードパーティ統合
- レシピ:シーンエディターを有効にする
- レシピ:カスタムSMTP
- レシピ:Discordボット
- 上級者:SSHアクセス
- 上級者:コンテンツCDN
- カスタムクライアントの作成と展開
- 上級者:Hubs Cloudブランドガイドライン

